A dad who has never used CAD wants one thing: to hear his daughter finish the tune. A small plastic part stands in the way.
AI CAD can help turn a dimensioned part concept into a model you can inspect and refine. In this Nora3D example, we lowered a key-support concept from 12 to 9 mm on the same model, keeping its base and mounting layout.
An imagined family story with AI-generated scene images. The Nora3D CAD work is real; the family, printing and successful repair are fictional.

She starts again. The same note stops her.
She has almost learned the whole piece. Then one white key stays down.
She tries the phrase again, more slowly. Same place. Same pause.
“Dad?”
He sits beside her and presses the key. The problem is small enough to fit under a fingertip, but it has stopped the whole evening.
He can describe the part. He cannot draw it.
In the story, a broken plastic guide beneath the key is the culprit. The rest of the instrument still matters: the familiar bench, the marked-up music book, the song she has been practicing.
Dad has a small 3D printer. CAD is the missing step.
He knows what the replacement needs to do: guide a moving piece, attach at two points, and fit into a small space. He can describe that purpose and supply dimensions, even though he does not know how to draw the part.
That gives the design a clear starting point: what must move, where the part attaches, and how much room it has.
From a description to a model he can inspect
For the real CAD sequence, we used AI-directed operations in a local Nora3D workspace to build a simplified key-support concept. Its base measures 40 × 18 × 3 mm, with two guide walls, a 10 mm channel between them and two 3.4 mm mounting holes. These dimensions define this concept, rather than a replacement for a specific piano.
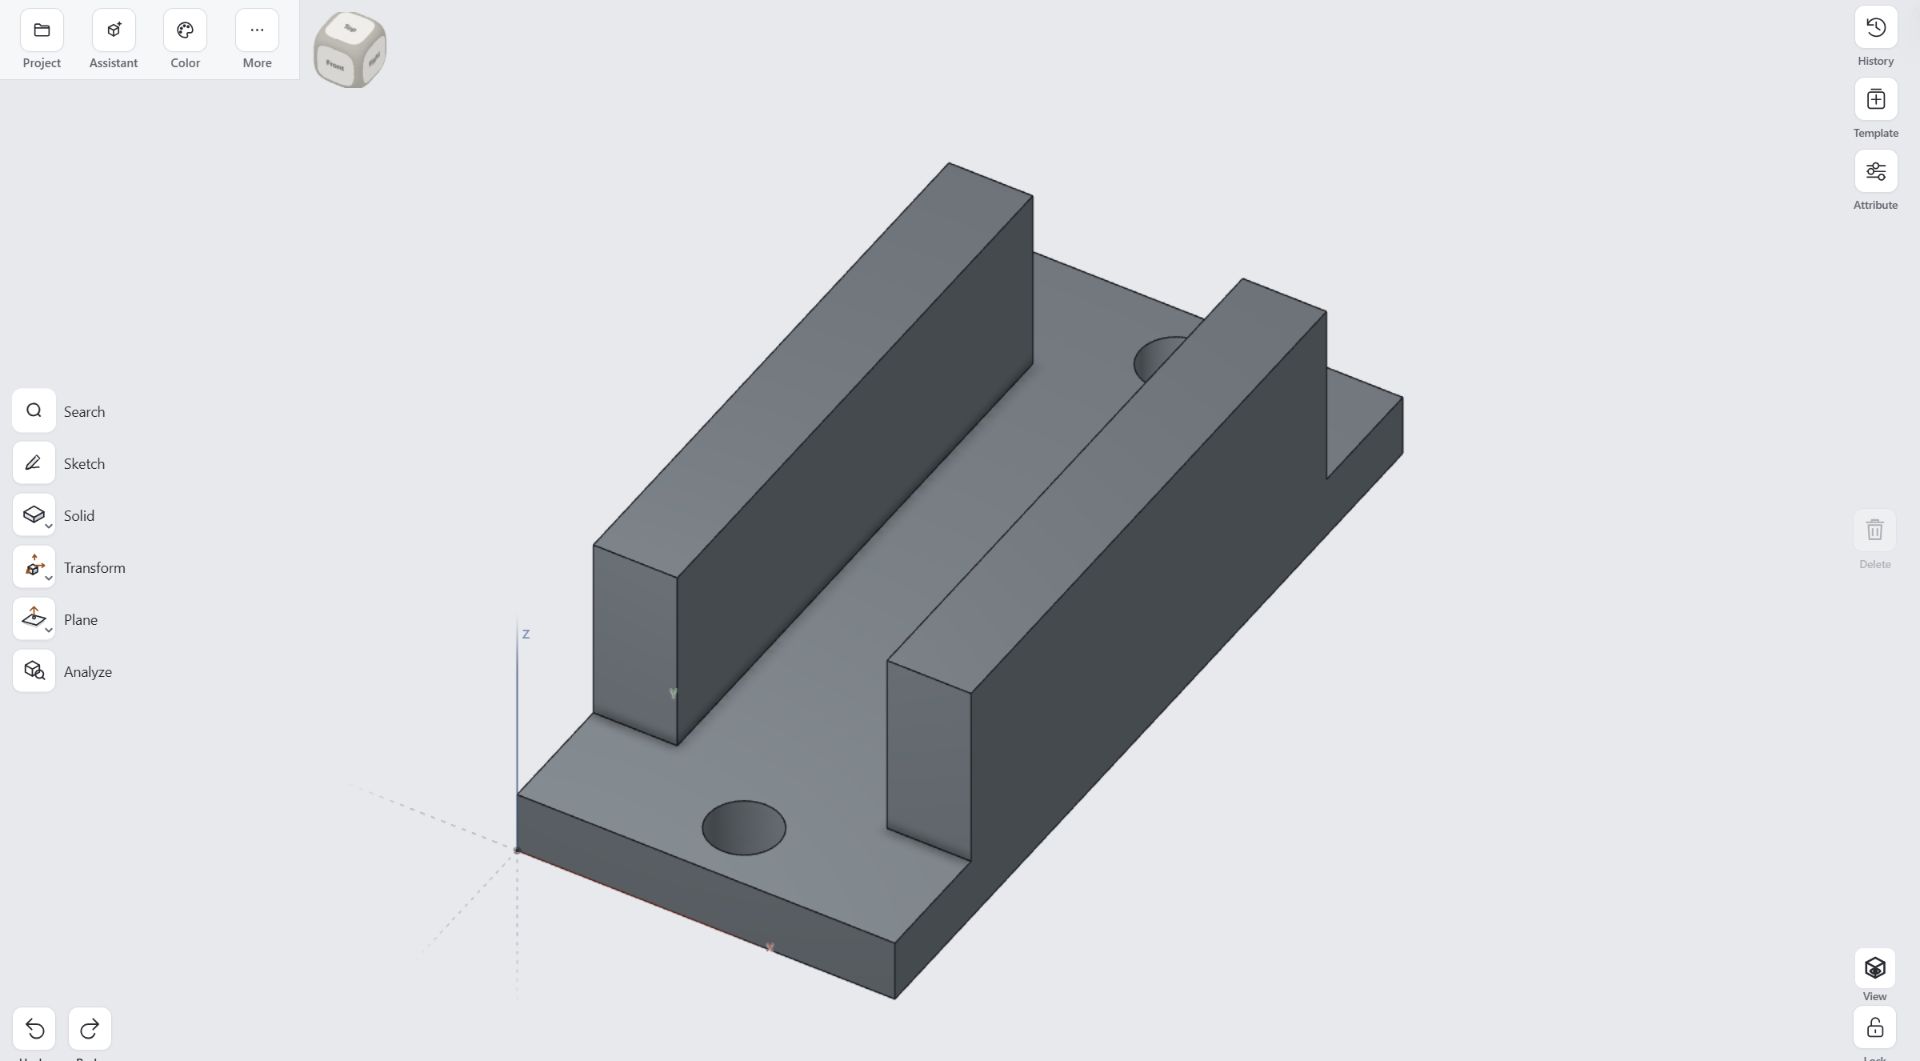
There is now something concrete to inspect. The walls, channel and mounting points are visible. The next decision can be about the part itself: which dimension needs to change, and which details should stay?
Less room above it. Lower the walls.
In the story, a second measurement reveals less room above the part than Dad first allowed. His next request is specific: lower the walls and keep the base and mounting layout.
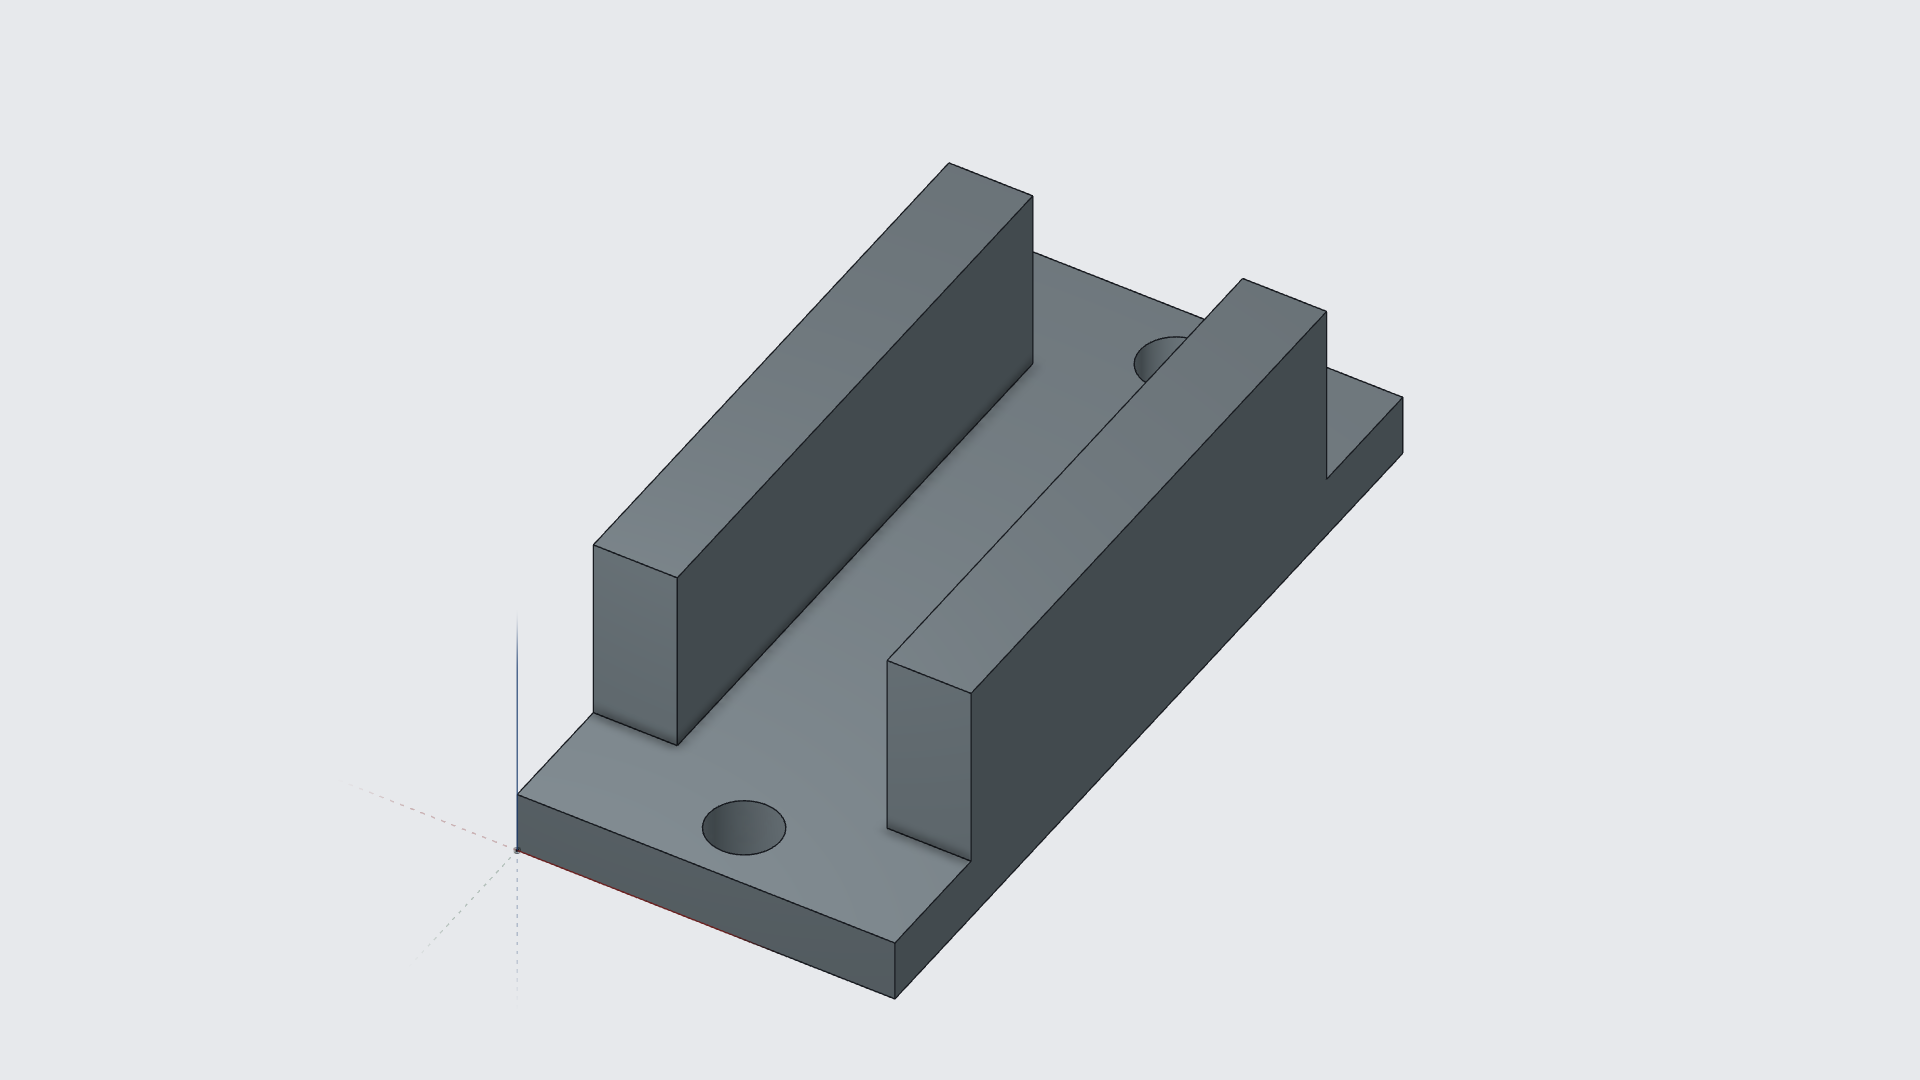
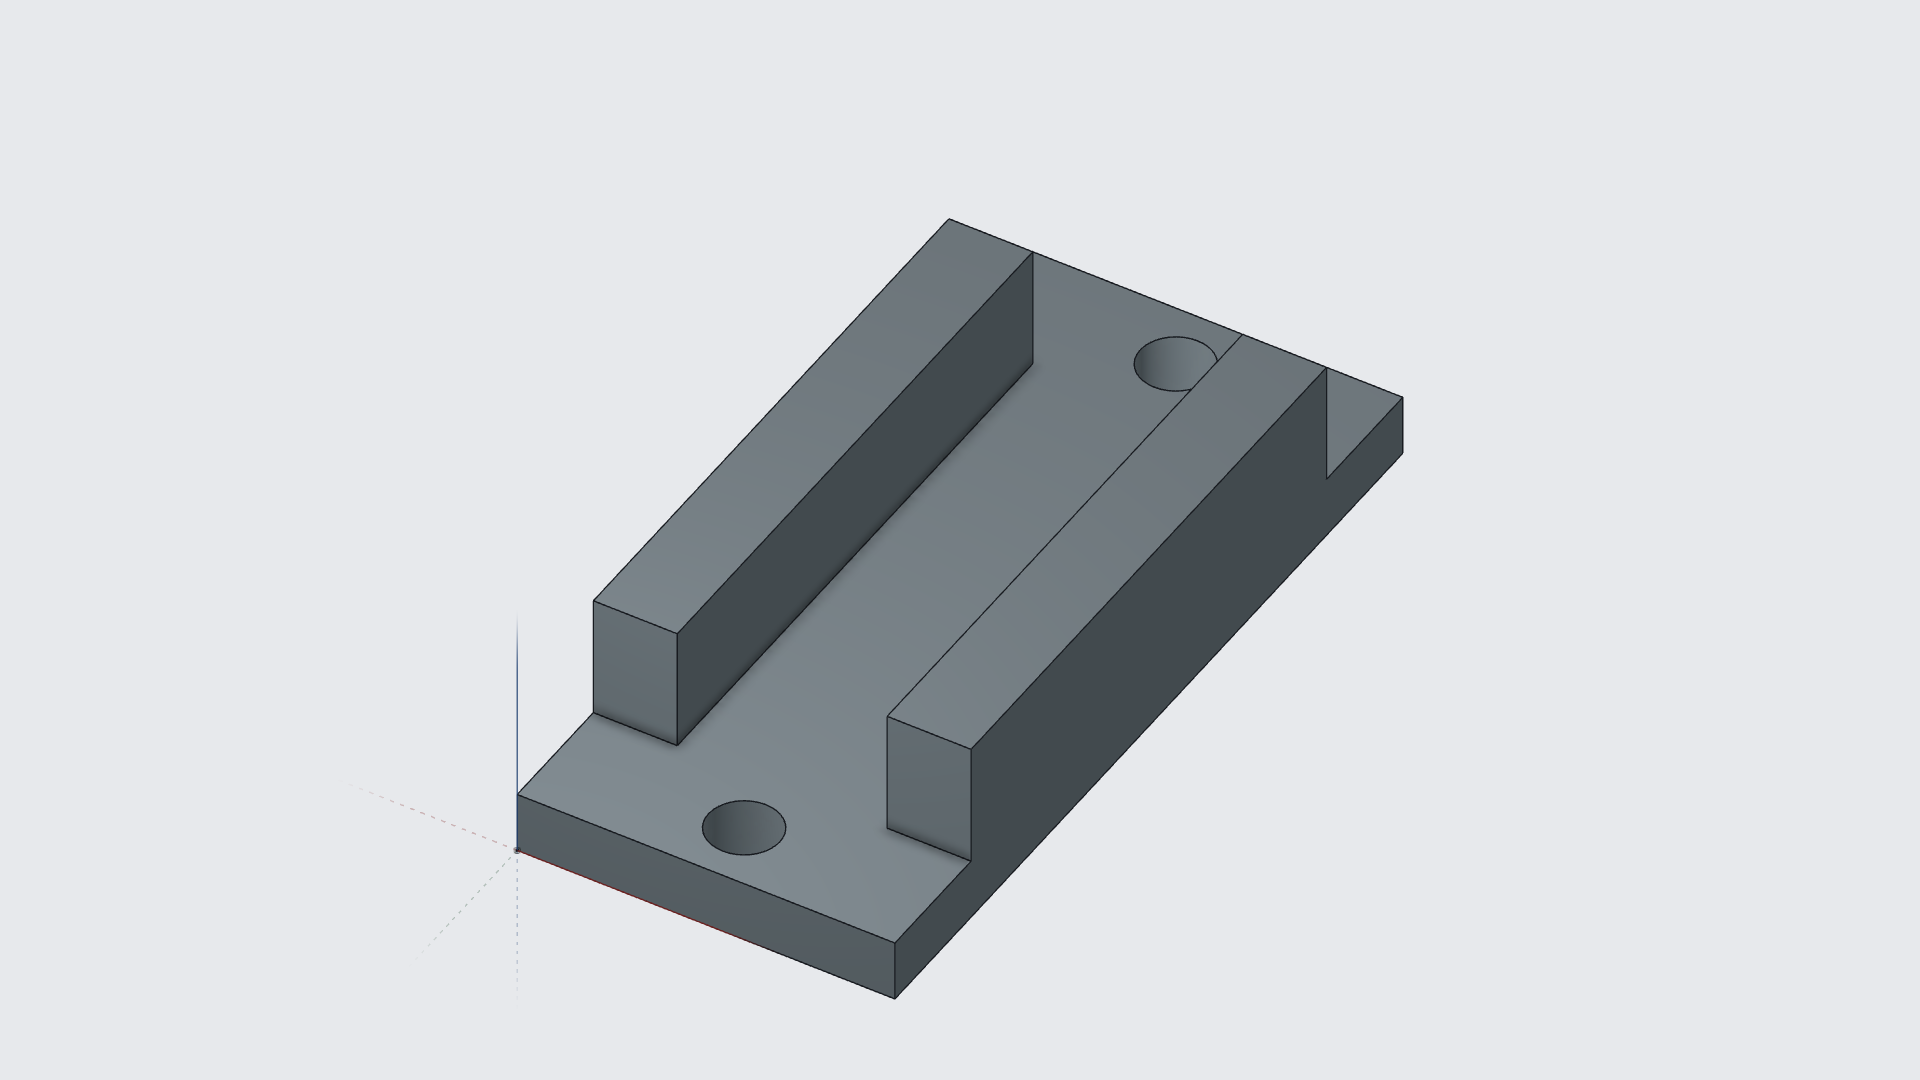
We made that adjustment on the same real Nora3D model. Its existing height dimension changed from 12 to 9 mm, measured from the underside of the base. With the base still 3 mm thick, the walls above it became 6 mm high instead of 9 mm.
| Dimension | Before | After |
|---|---|---|
| Overall height | 12 mm | 9 mm |
| Wall height above the base | 9 mm | 6 mm |
| Base footprint | 40 × 18 mm | 40 × 18 mm |
| Base thickness | 3 mm | 3 mm |
The lower walls are visible in the comparison; the plate and mounting holes remain. We saved and reopened the document, then checked the 9 mm dimension, the overall bounds and the valid closed solid again.
The useful result is more than a first shape. It is a design that can carry the next decision forward. A smaller space becomes a specific edit to the existing model.
Then she plays past the broken note.
Back in our imagined evening, the printer finishes. Dad brings the small replacement to the piano, fits it into place and checks the key.
He calls her over.
This time, she plays through the note that kept stopping her. Then the next one. Then the end of the phrase.
She turns on the bench with a grin that says more than a measurement ever could.
“Again?”

He did not set out to become a CAD expert. He wanted to hear the rest of her song.
Bring the next small part into focus
For your own project, start with the part's job, its measurements and the space around it. Identify what you need to change and what must stay. Then inspect the model before moving on to the next step.
See how one remote-holder design was refined through two width changes, or use our functional CAD review checklist to decide what to measure after an edit.
A separate real repair: Luke Merwin's October 2023 account describes restoring his digital piano with a 3D-printed key-weight arm. It provides real-world context for this story, but is a different repair and a different part.