Case study: editable AI CAD for a custom storage-case insert. Nora3D was used to add an editable organizer to an existing case model, enlarge its cable and adapter pockets, and save and reopen the revised design. The insert kept its outer dimensions. Printing and physical fit remain untested.
The cable got bigger. The adapter got wider. Apparently, nobody told the storage case.
Throwing away the whole design would solve that problem. It would also be a strange reward for all the parts that still work.
This is the kind of job I want Nora3D to get better at: adapt a functional part to a real need, preserve the important structure, and make the result something you can inspect, revise, and eventually test in your hands.
Not another model that merely looks plausible. A useful next version of a part.
Start with something worth keeping
For this example, we started with the Gridfinity Storage Box model in Nora3D's template library. It provided the case body, lid, and detail parts. We kept those as the starting geometry and added a new two-pocket organizer concept.
The design brief was simple: keep the case, give the cable more room, accommodate a wider adapter, and make the contents easier to pick up.
The new insert measured 180 × 120 × 28 mm. Its editable features were added after the template was inserted. We did not recover or edit the imported case's original parameters; those were not exposed in this session.
That distinction matters. Controlled editing starts with knowing what you are changing—and what you are leaving alone.
Change the dimensions that serve the job
The initial cable pocket was a 60 × 60 mm square. We lengthened it to 106 × 60 mm. The adapter pocket grew from 44 × 60 mm to 80 × 90 mm.
These are changes to the compartment footprints, not to the insert's overall height. The organizer's outer dimensions stayed the same.
| Feature | Initial design | Revised design |
|---|---|---|
| Cable pocket | 60 × 60 mm | 106 × 60 mm |
| Adapter pocket | 44 × 60 mm | 80 × 90 mm |
| Insert outer dimensions | 180 × 120 × 28 mm | Unchanged |
We also added a 12 mm radius thumb-access recess at the adapter pocket's front edge. Space alone is not enough: you need a way to get the object out again.
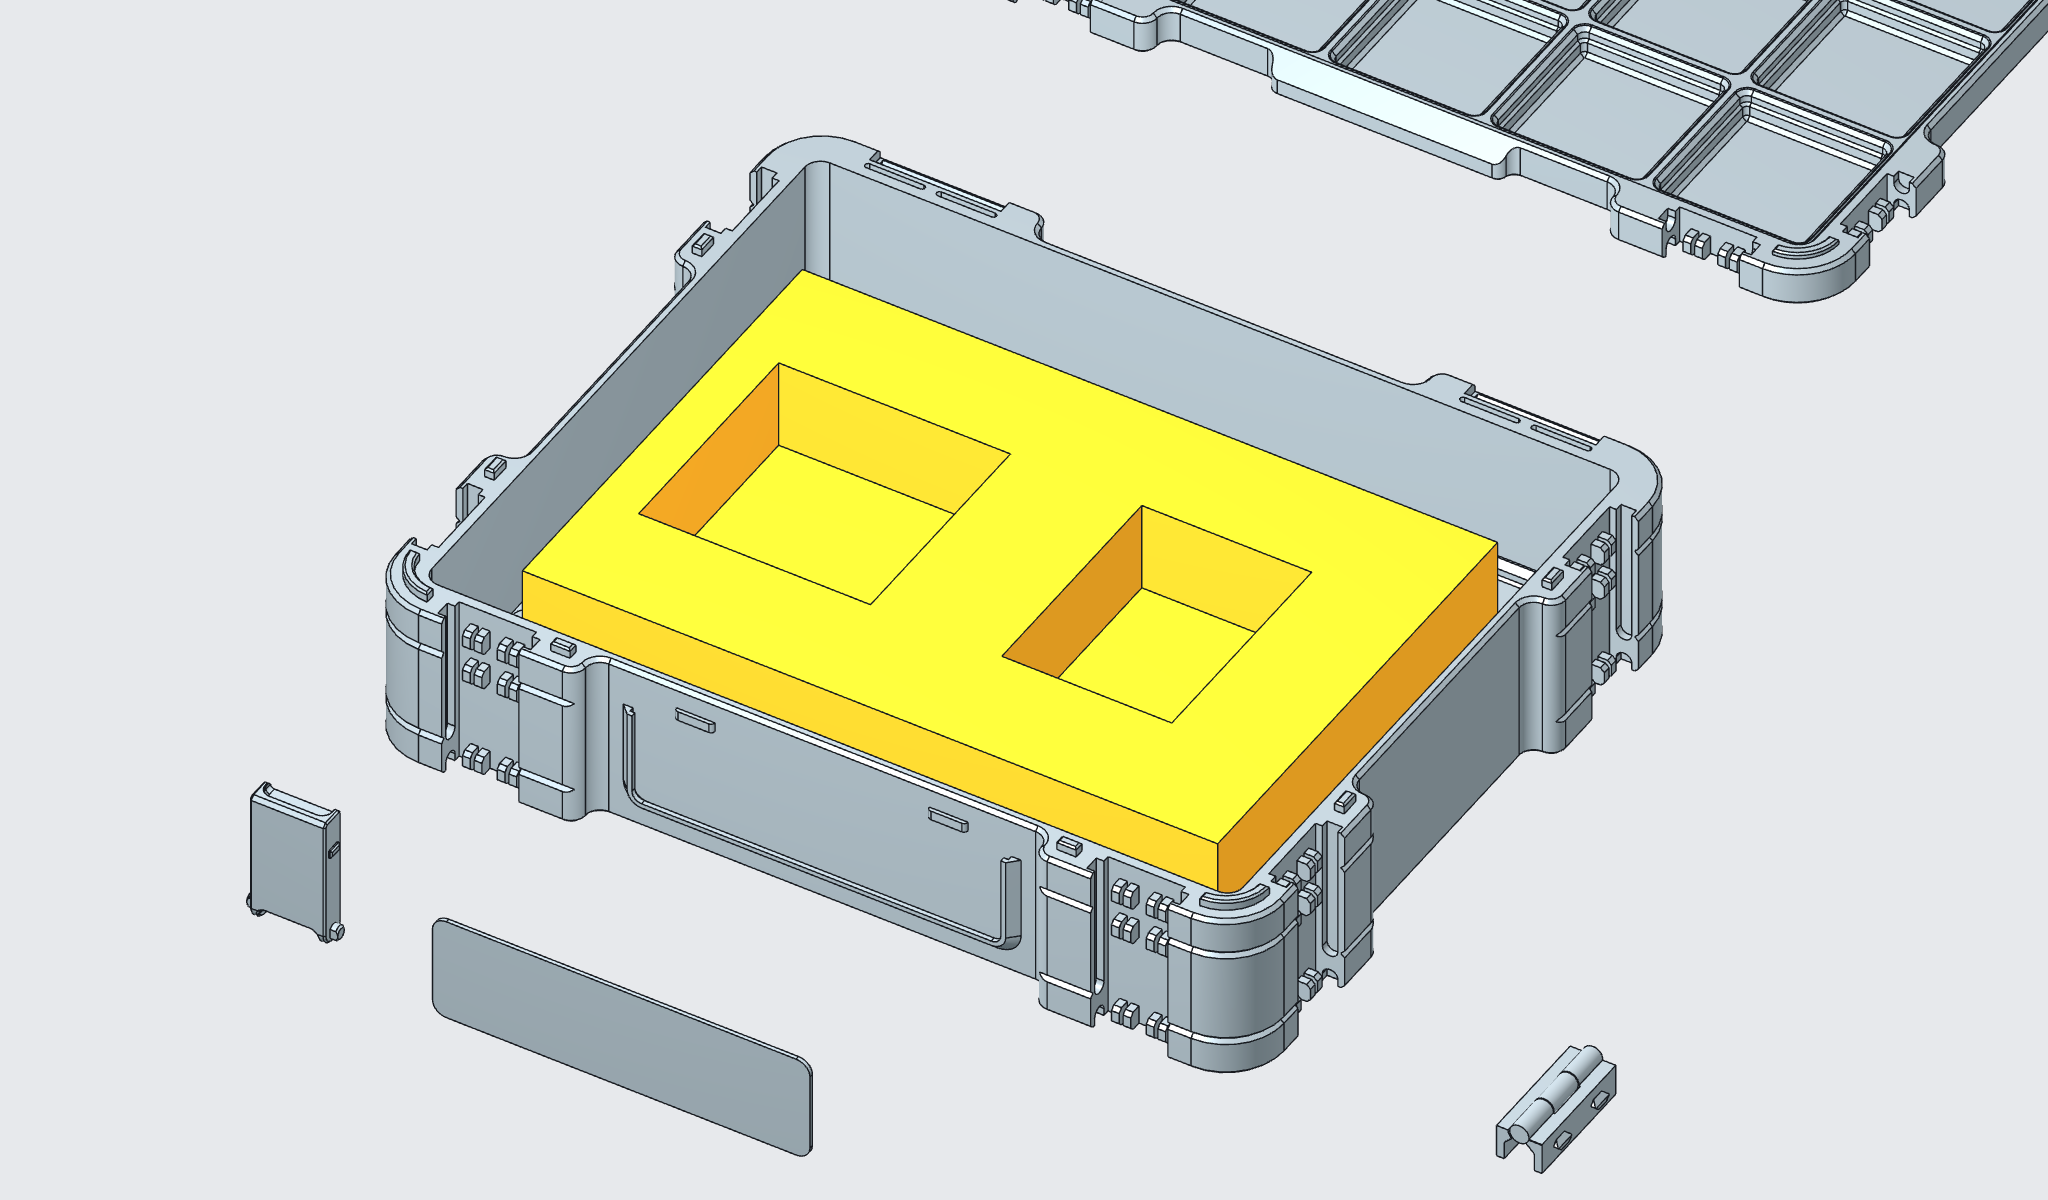
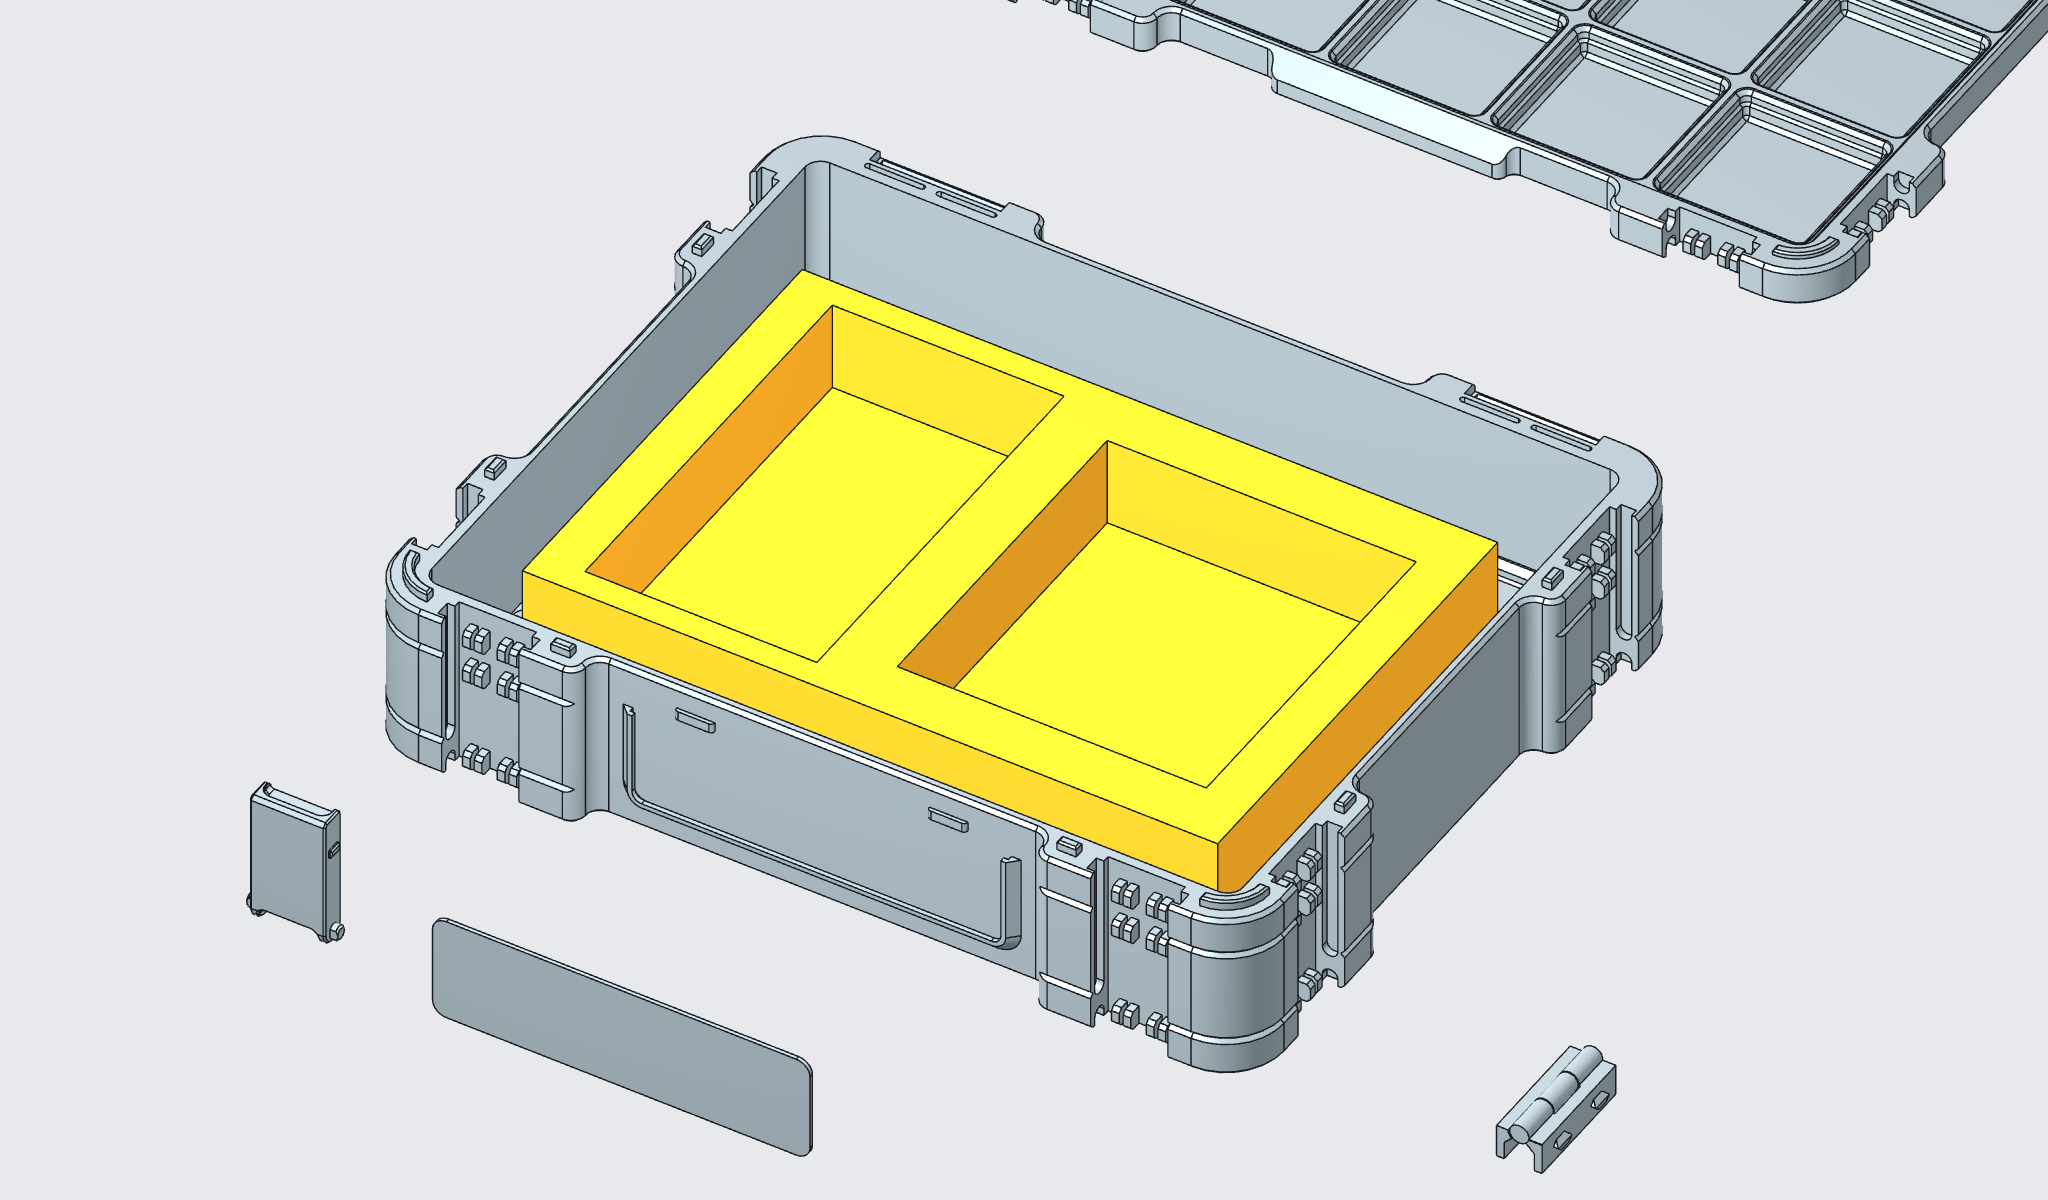
The point is not that these are the right dimensions for everyone's equipment. They are explicit dimensions that can be checked against the equipment you actually own, then changed again.
A saved model, not just a convincing picture
After saving and reopening the document, the saved revision, feature identities, solid identities, and eleven new dimension values matched. The native geometry query still reported the insert's 180 × 120 × 28 mm outer bounds.
That gives us evidence of continuity: the edited design is still there when we return to it. It does not prove that a particular adapter fits, that the lid closes, or that the part will print correctly.
The short video combines actual CAD before-and-after images with selected native feature-history replay. It is edited, not a continuous recording of parameter entry or a claim that the model was built in eighteen seconds.
The destination is a testable part
The people I most want to help already have a physical goal: an existing model, measured dimensions, or a part that almost fits. Their work is rarely finished after the first shape appears.
Their request sounds more like this:
Adapt this part to my actual use. Preserve the structure that matters. Give me a version I can inspect, download, and trial-fit.
That is the direction I want Nora3D to pursue—not a claim that this example has completed every step.
This organizer has not been printed, physically fit-tested, or exported as a printable file for this sample. Lid clearance, interference, tolerances, and retention still need checking. Its library source is named Gridfinity Storage Box, but this new rectangular insert is not a verified Gridfinity-compatible bin. The case is shown in its library layout, not a demonstrated working assembly.
The next useful step is to measure the actual gear, check the clearances, export and inspect a print file, and trial-fit a first print. If something is wrong, return to the same editable design and change the relevant dimension.
That is the loop I care about: keep what works, change what needs to fit, and check the result against the real world.
Start with your own part in Nora3D.