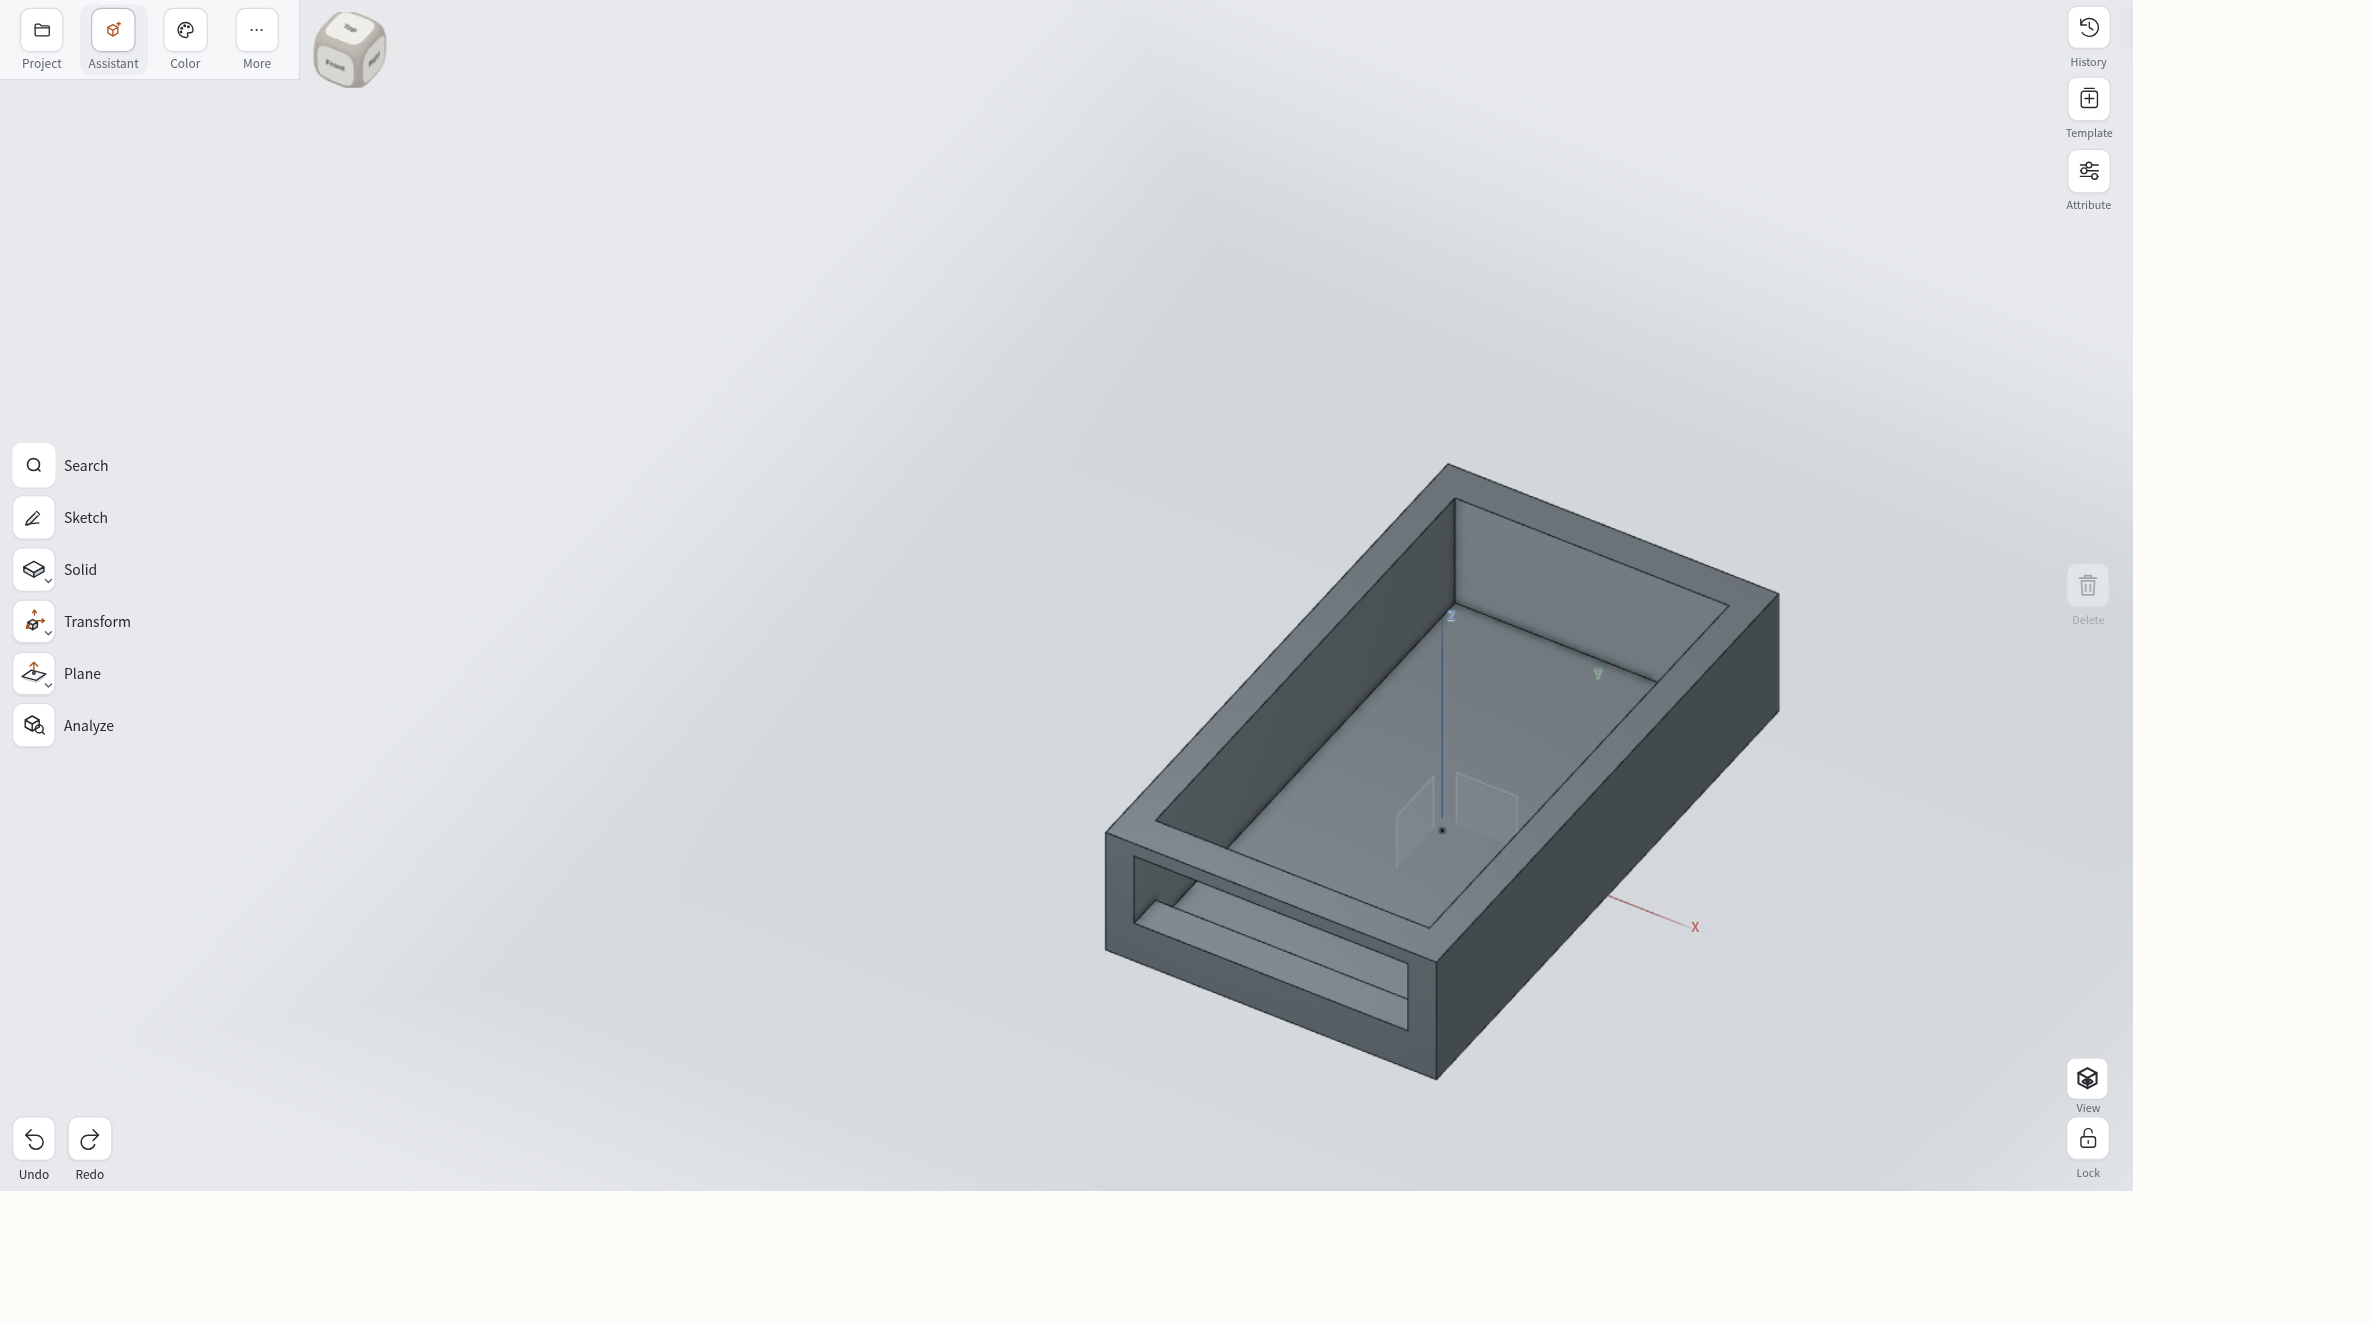
A new GaN laptop brick showed up on the desk—thicker than the last one—and the under-desk cradle you already modeled no longer sits the brick the way you want. The outer sled still matches the mounting plan. The bay and the retention lip do not.
That is a real-world use for AI CAD built around functional parts you can keep editing: keep the same cradle solid, change the bay and lip, then export STEP or STL when you are ready for the next tool in your loop. You can continue that work on a phone, tablet, or computer.
1. Prompt a first under-desk cradle solid
Open a Nora3D CAD workspace. In the Assistant, describe a compact under-desk power-brick cradle / sled: a shallow bay to hold a laptop brick, a small retention lip at the front, and an outer footprint that can sit against an under-desk mount plan.
For this demo, aim for an outer footprint around 120 × 70 × 28 mm (design intent). Generate the first solid and leave it as the part you will keep editing—not a throwaway sketch you plan to redraw later.
2. Inspect the bay that no longer fits
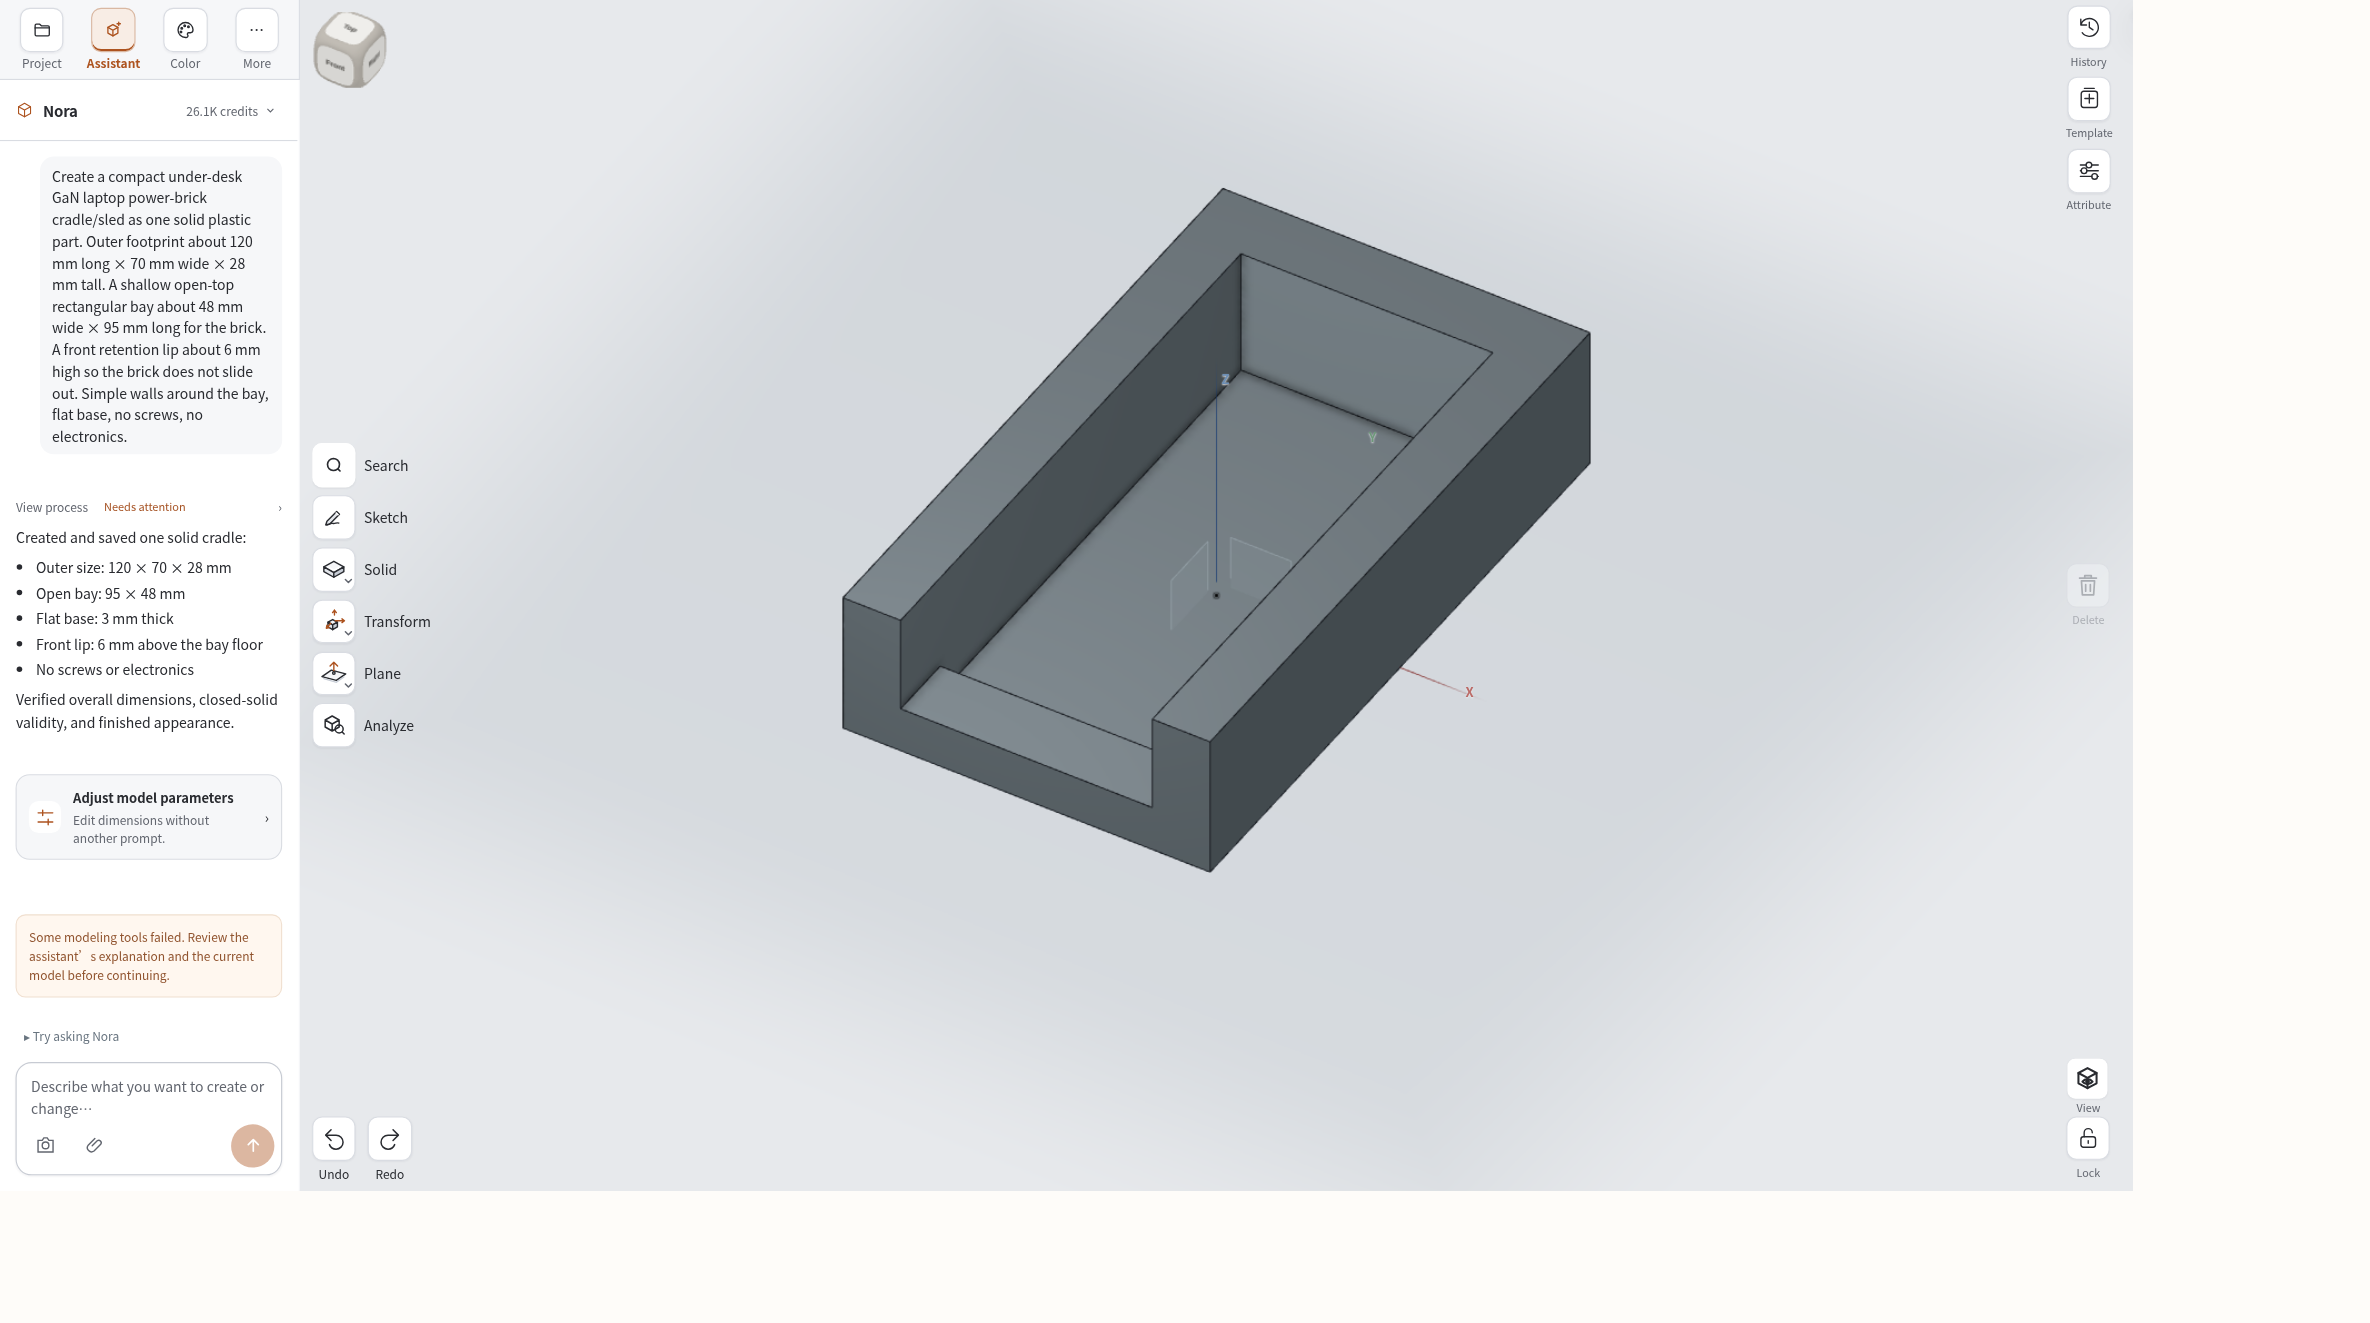
Orbit the solid. Read the bay width, bay length, and retention lip height the way you would on a part that almost works.
The first bay is about 48 mm wide and 95 mm long, with a retention lip around 6 mm high.
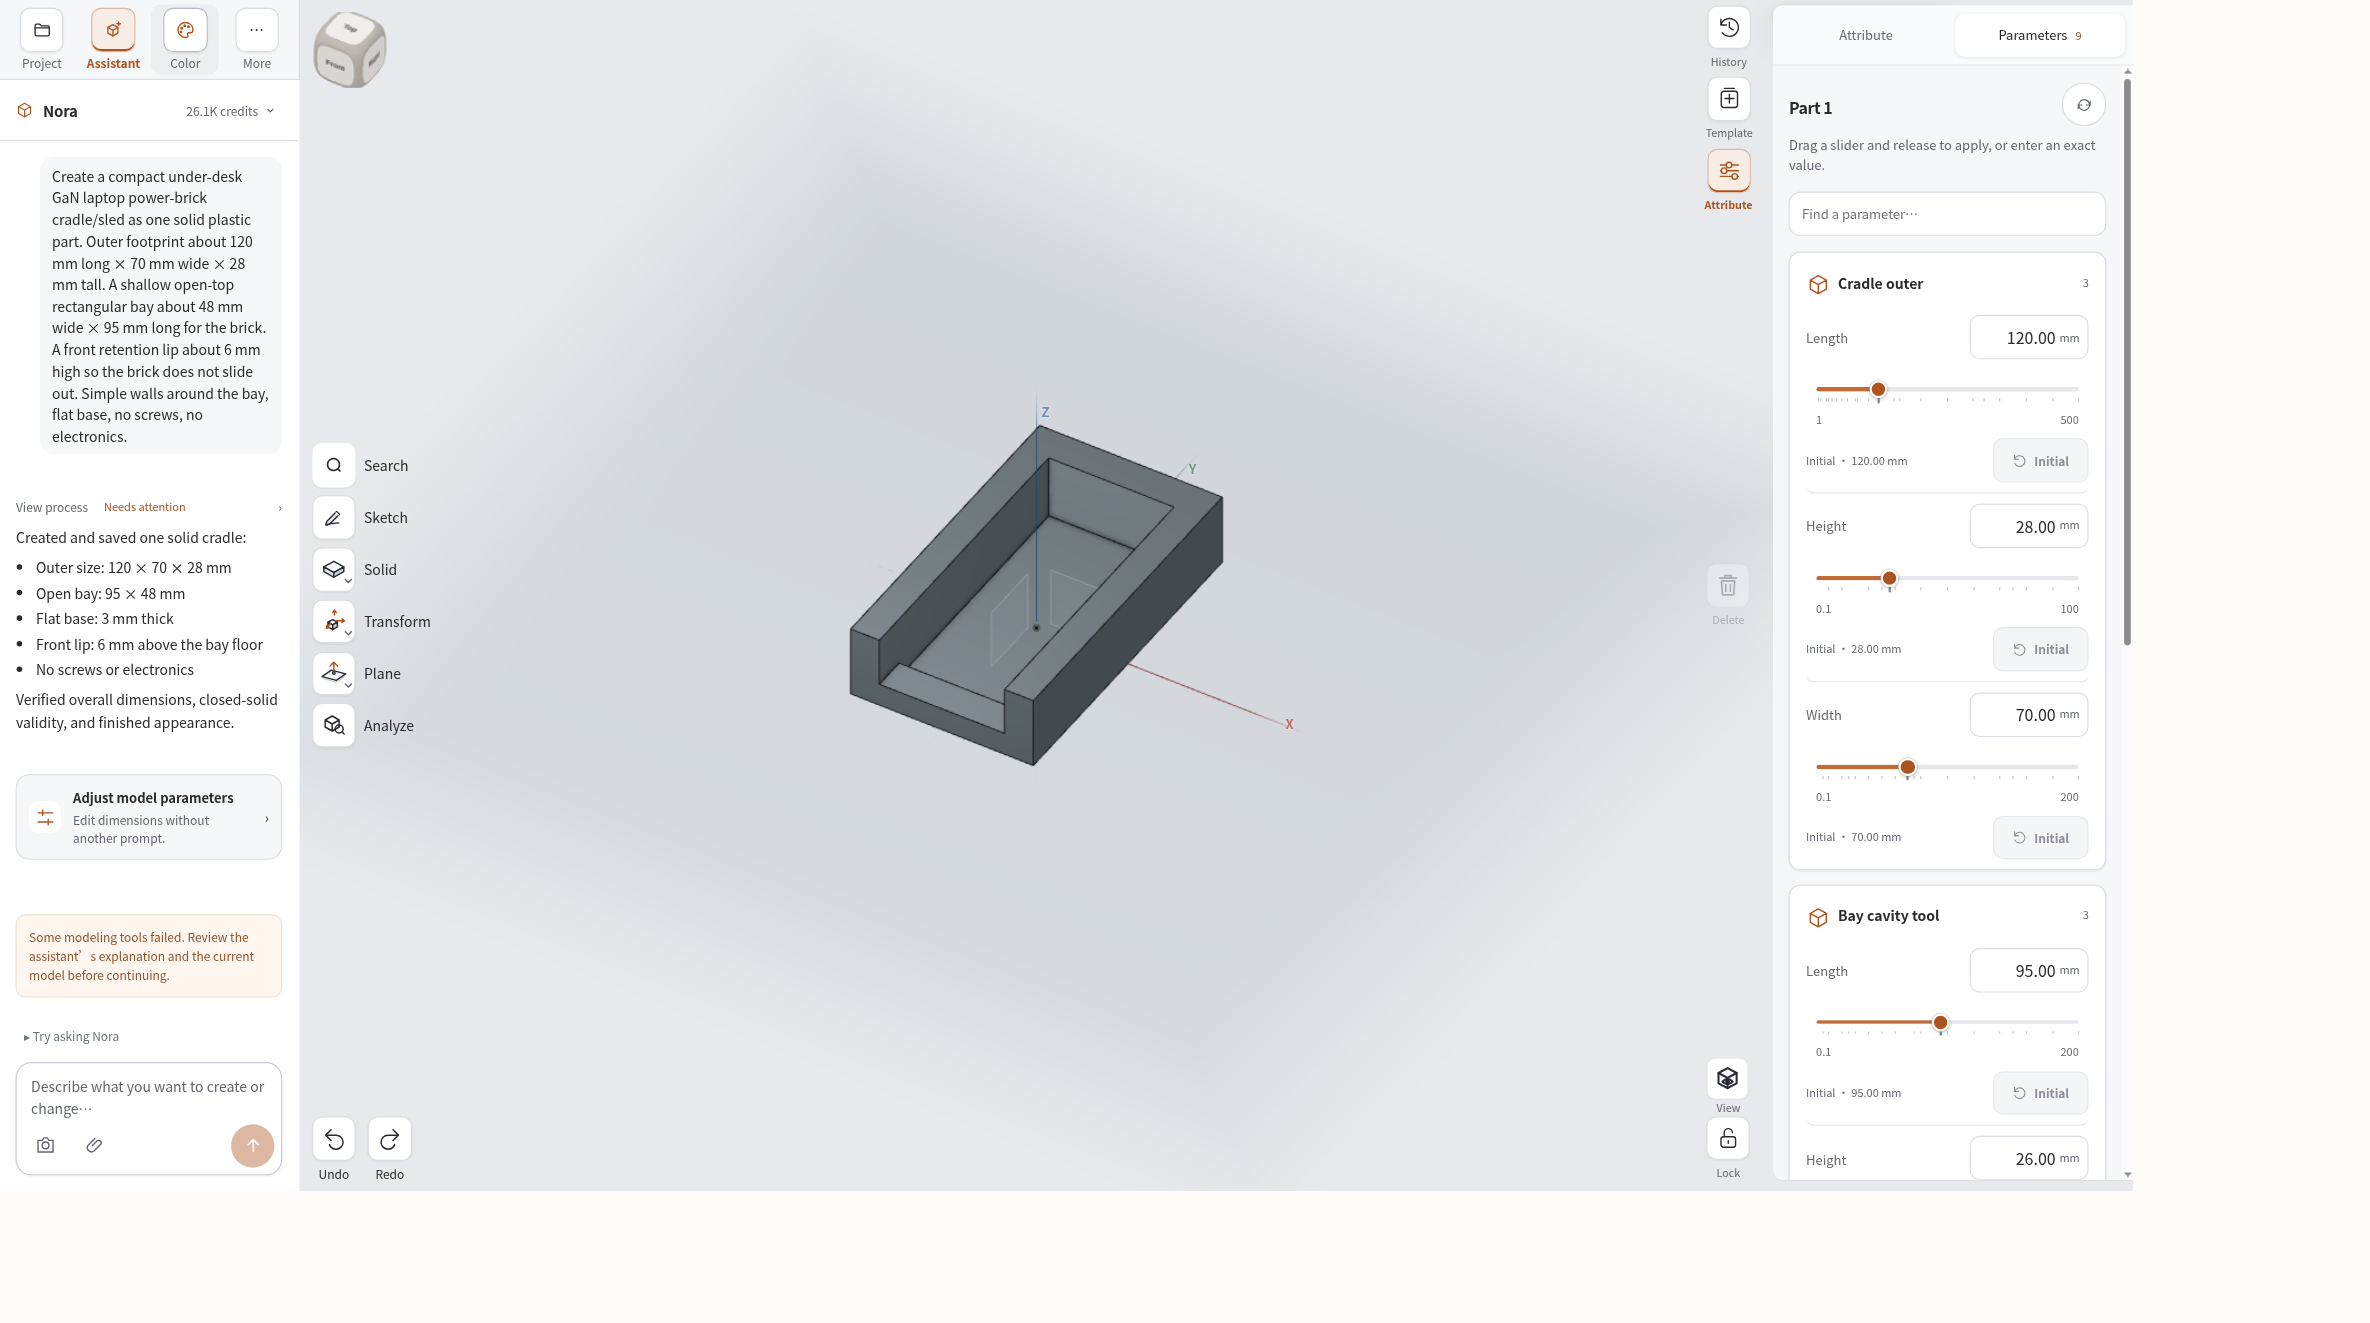
The useful question is narrow: which faces move so a thicker brick can sit in the bay, while the outer sled stays put?
3. Widen the bay on the same model
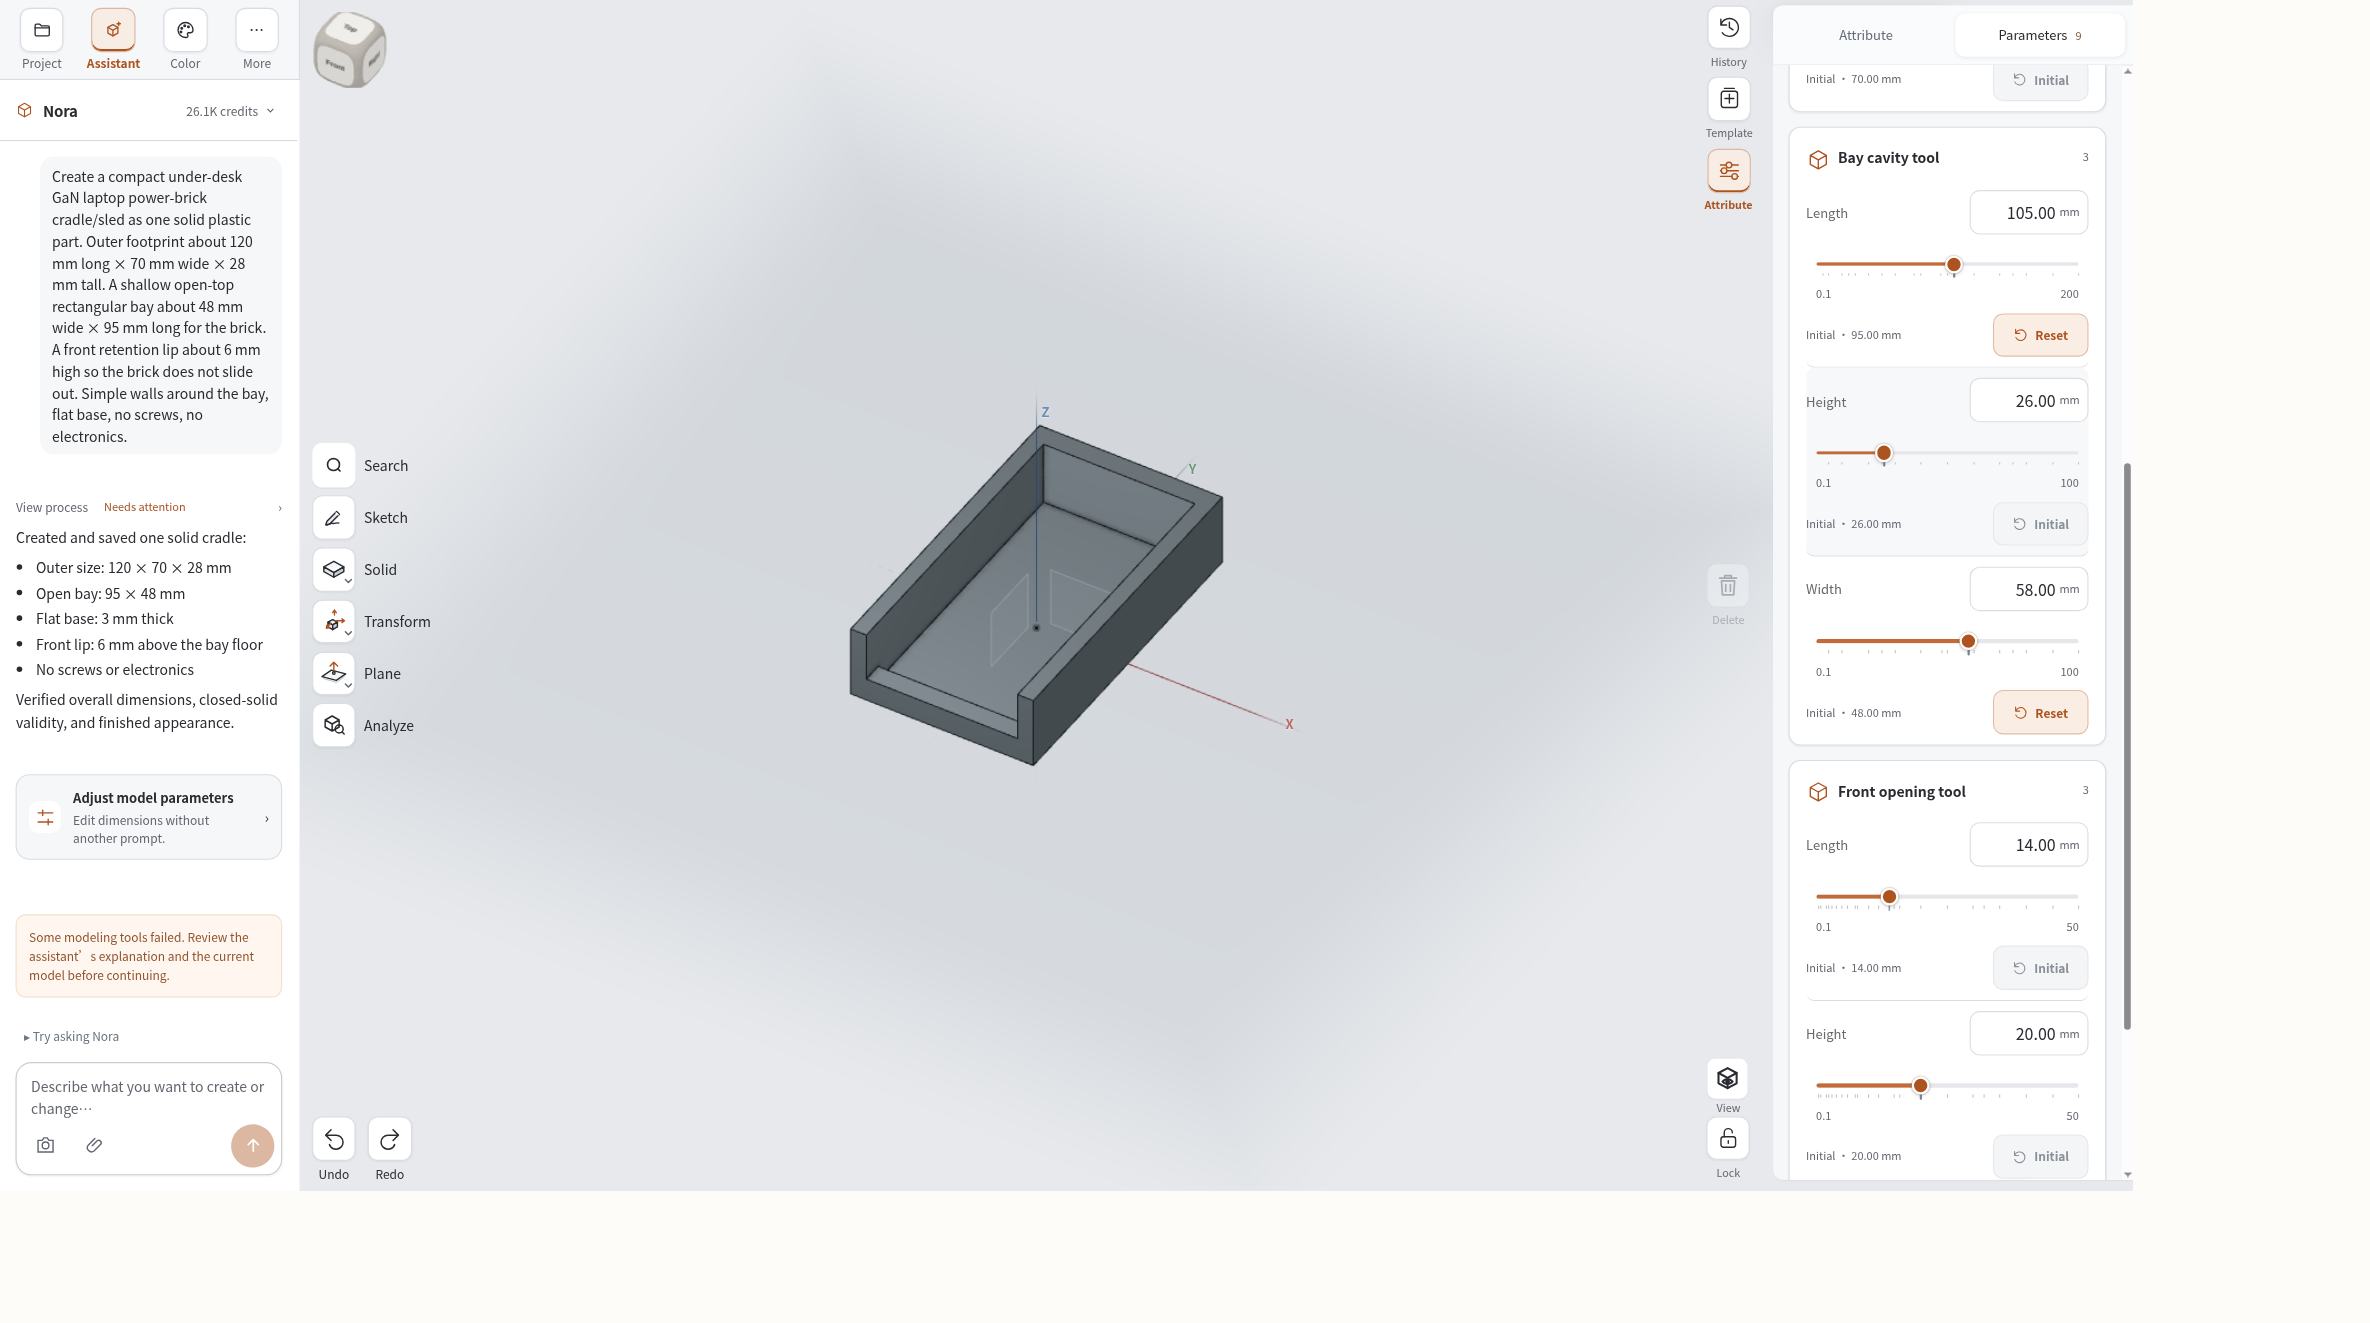
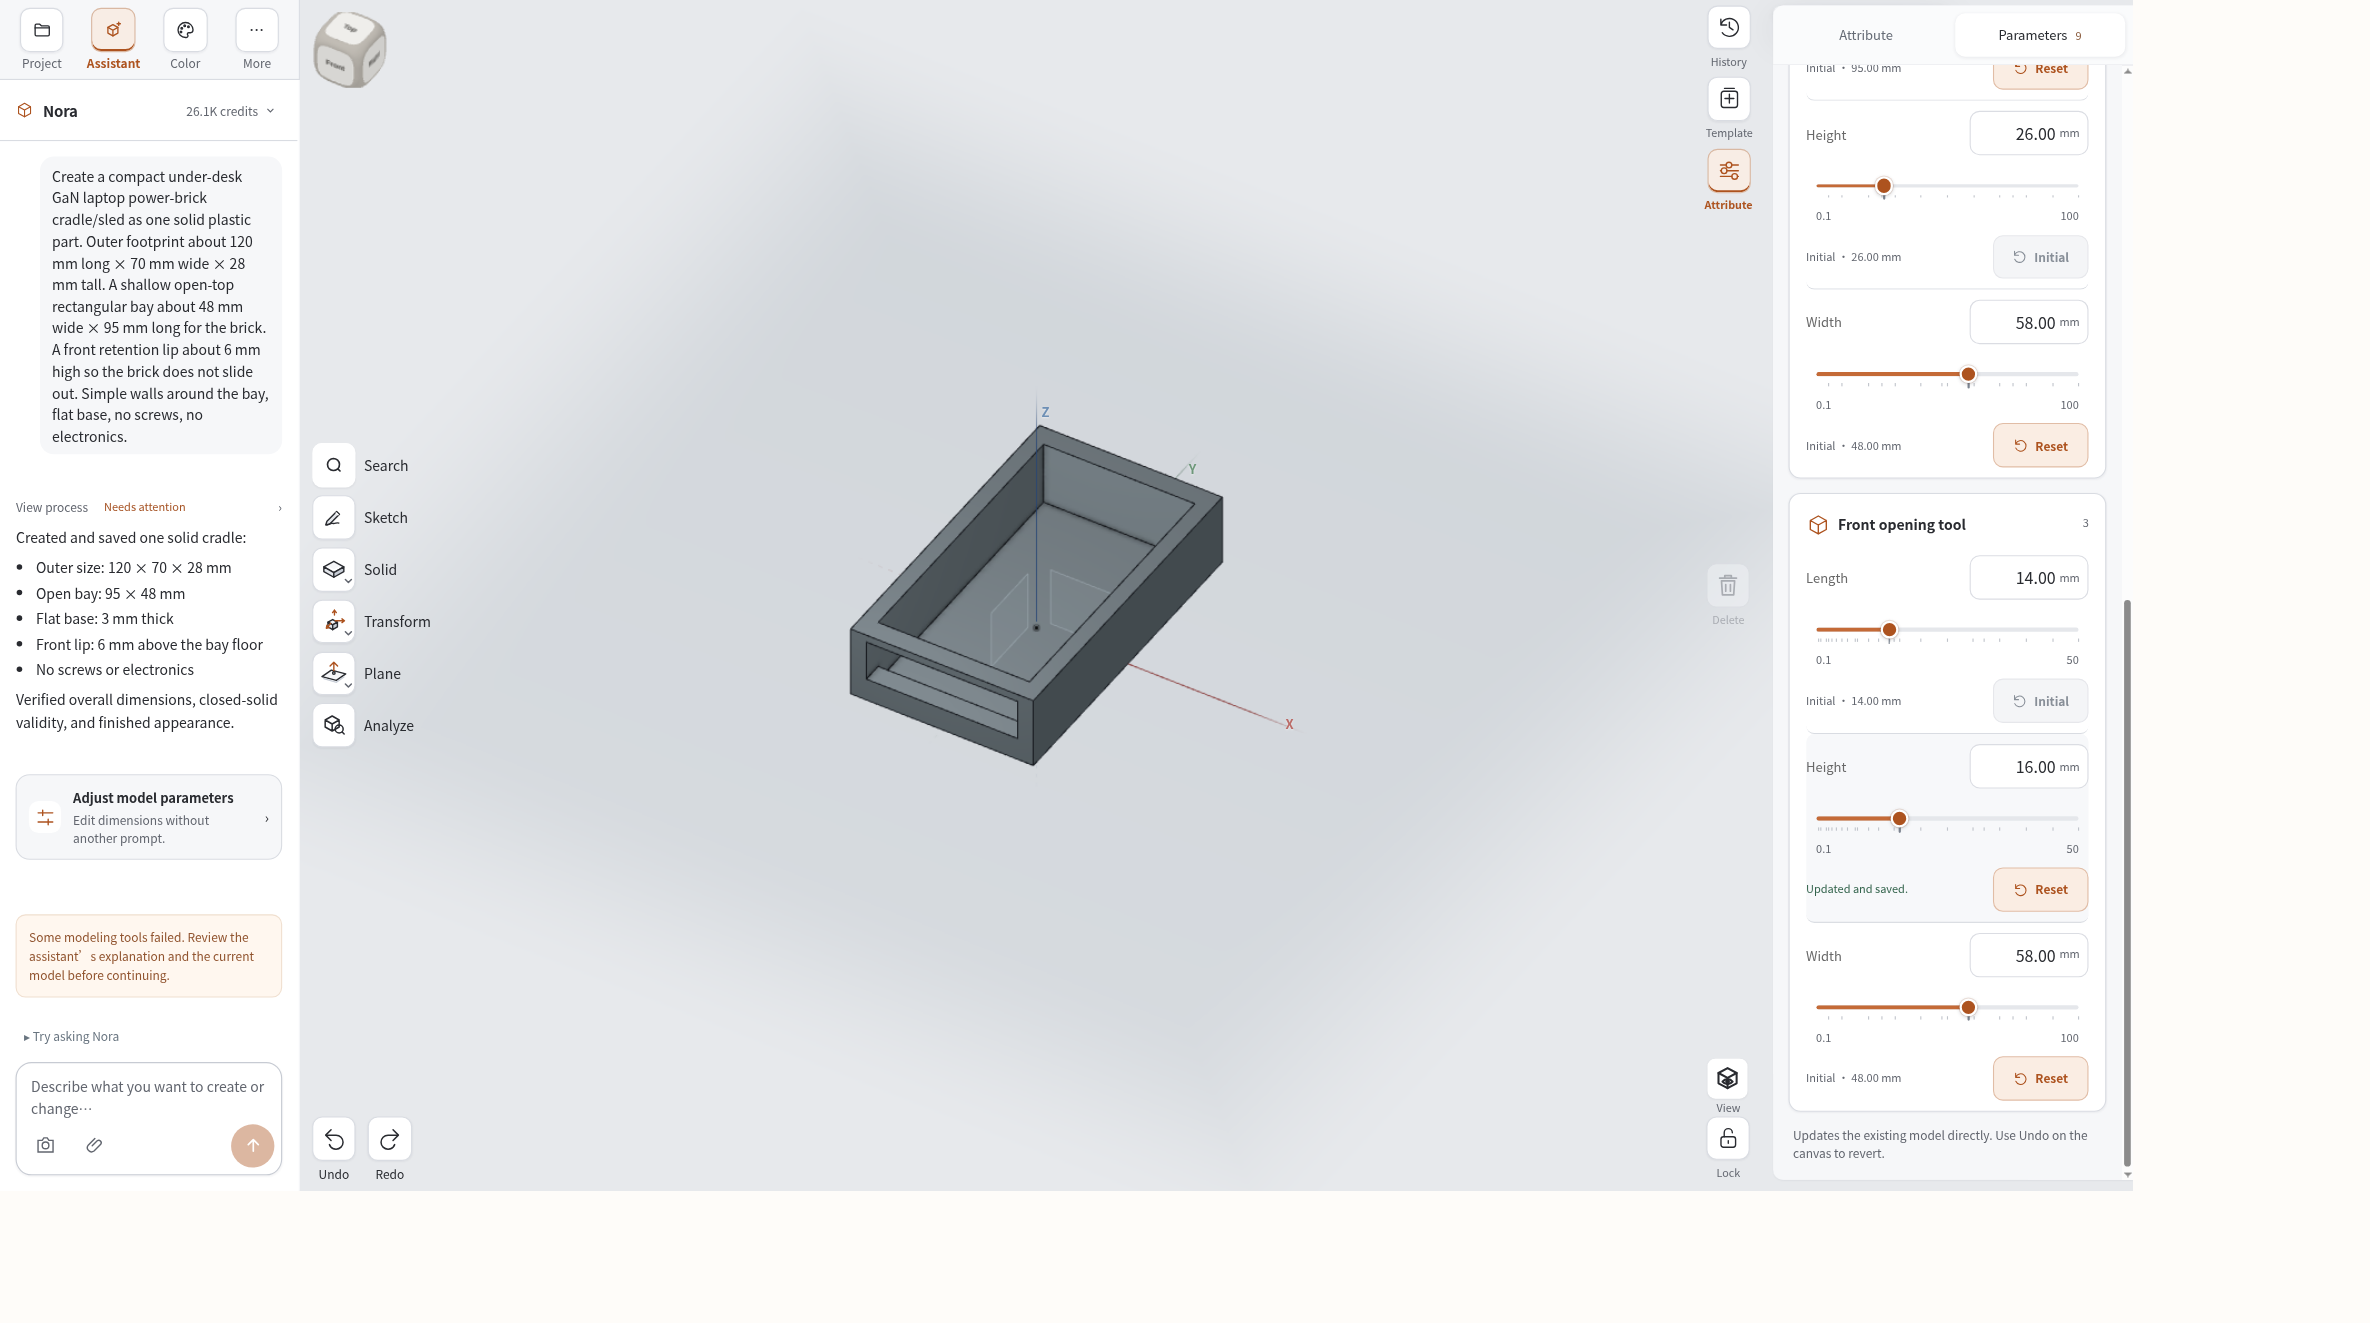
Stay on the same cradle. Use a short follow-up prompt and/or the Parameters / Dimensions tools to widen and lengthen the bay—without discarding the outer footprint.
The dimensions change as follows:
| Feature | Before (design) | After (design) |
|---|---|---|
| Outer footprint | ~120 × 70 × 28 mm | Unchanged (intent) |
| Bay width | 48 mm | 58 mm |
| Bay length | 95 mm | 105 mm |
| Retention lip height | 6 mm | (next step) |
Ask Nora to update the existing solid, or nudge the native dimensions that control the bay. The goal is continuity: same part history, wider pocket.
If you want to try the same keep-editing loop yourself, you can install Nora3D and open a workspace when you are ready.
4. Raise the retention lip with CAD tools
A wider bay alone may still leave the brick under-constrained visually on the sled. On the same solid, use Parameters / Dimensions on the front-opening feature (or sketch + Extrude) so the retention wall left above the bay floor goes from about 6 mm to about 10 mm.
You are not starting a second cradle. You are refining the lip that already belongs to this sled.
5. Check History before you leave the workspace
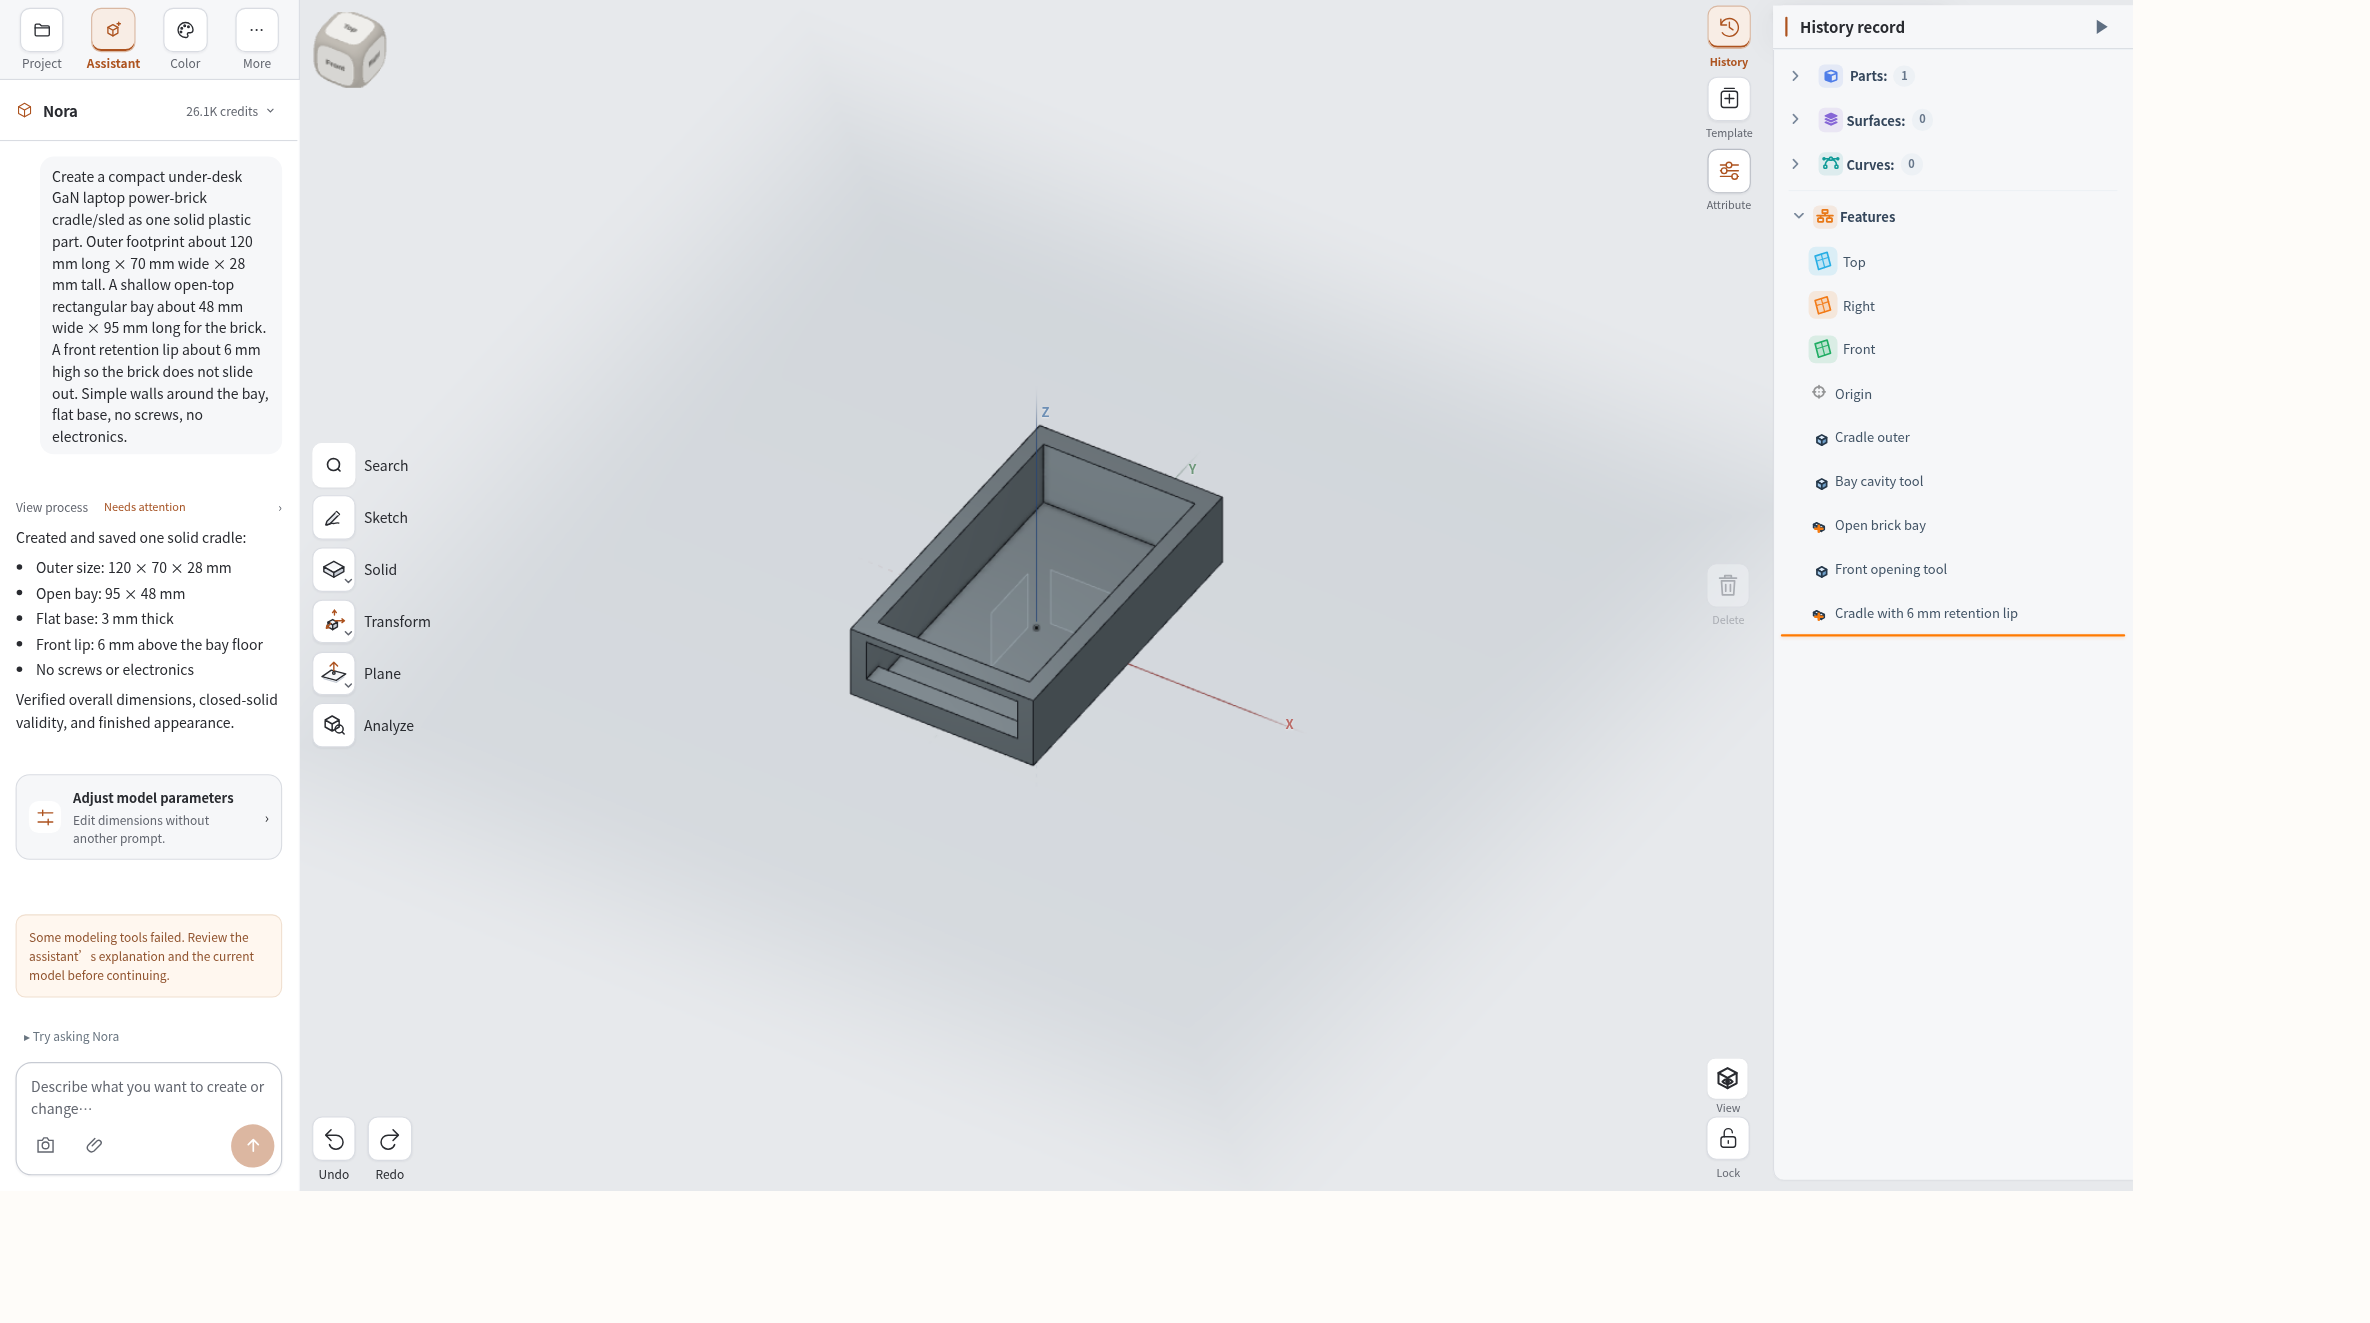
Open History and scan the build sequence. You should still see one cradle lineage: the first solid, then the bay and lip edits stacked as features or parameter updates—not a brand-new generator replacing the part.
Confirm the demo parameters you care about (bay width/length, lip height) read the way you expect. History is how you trust that you kept editing the same functional part.
6. Export STEP or STL from the same model
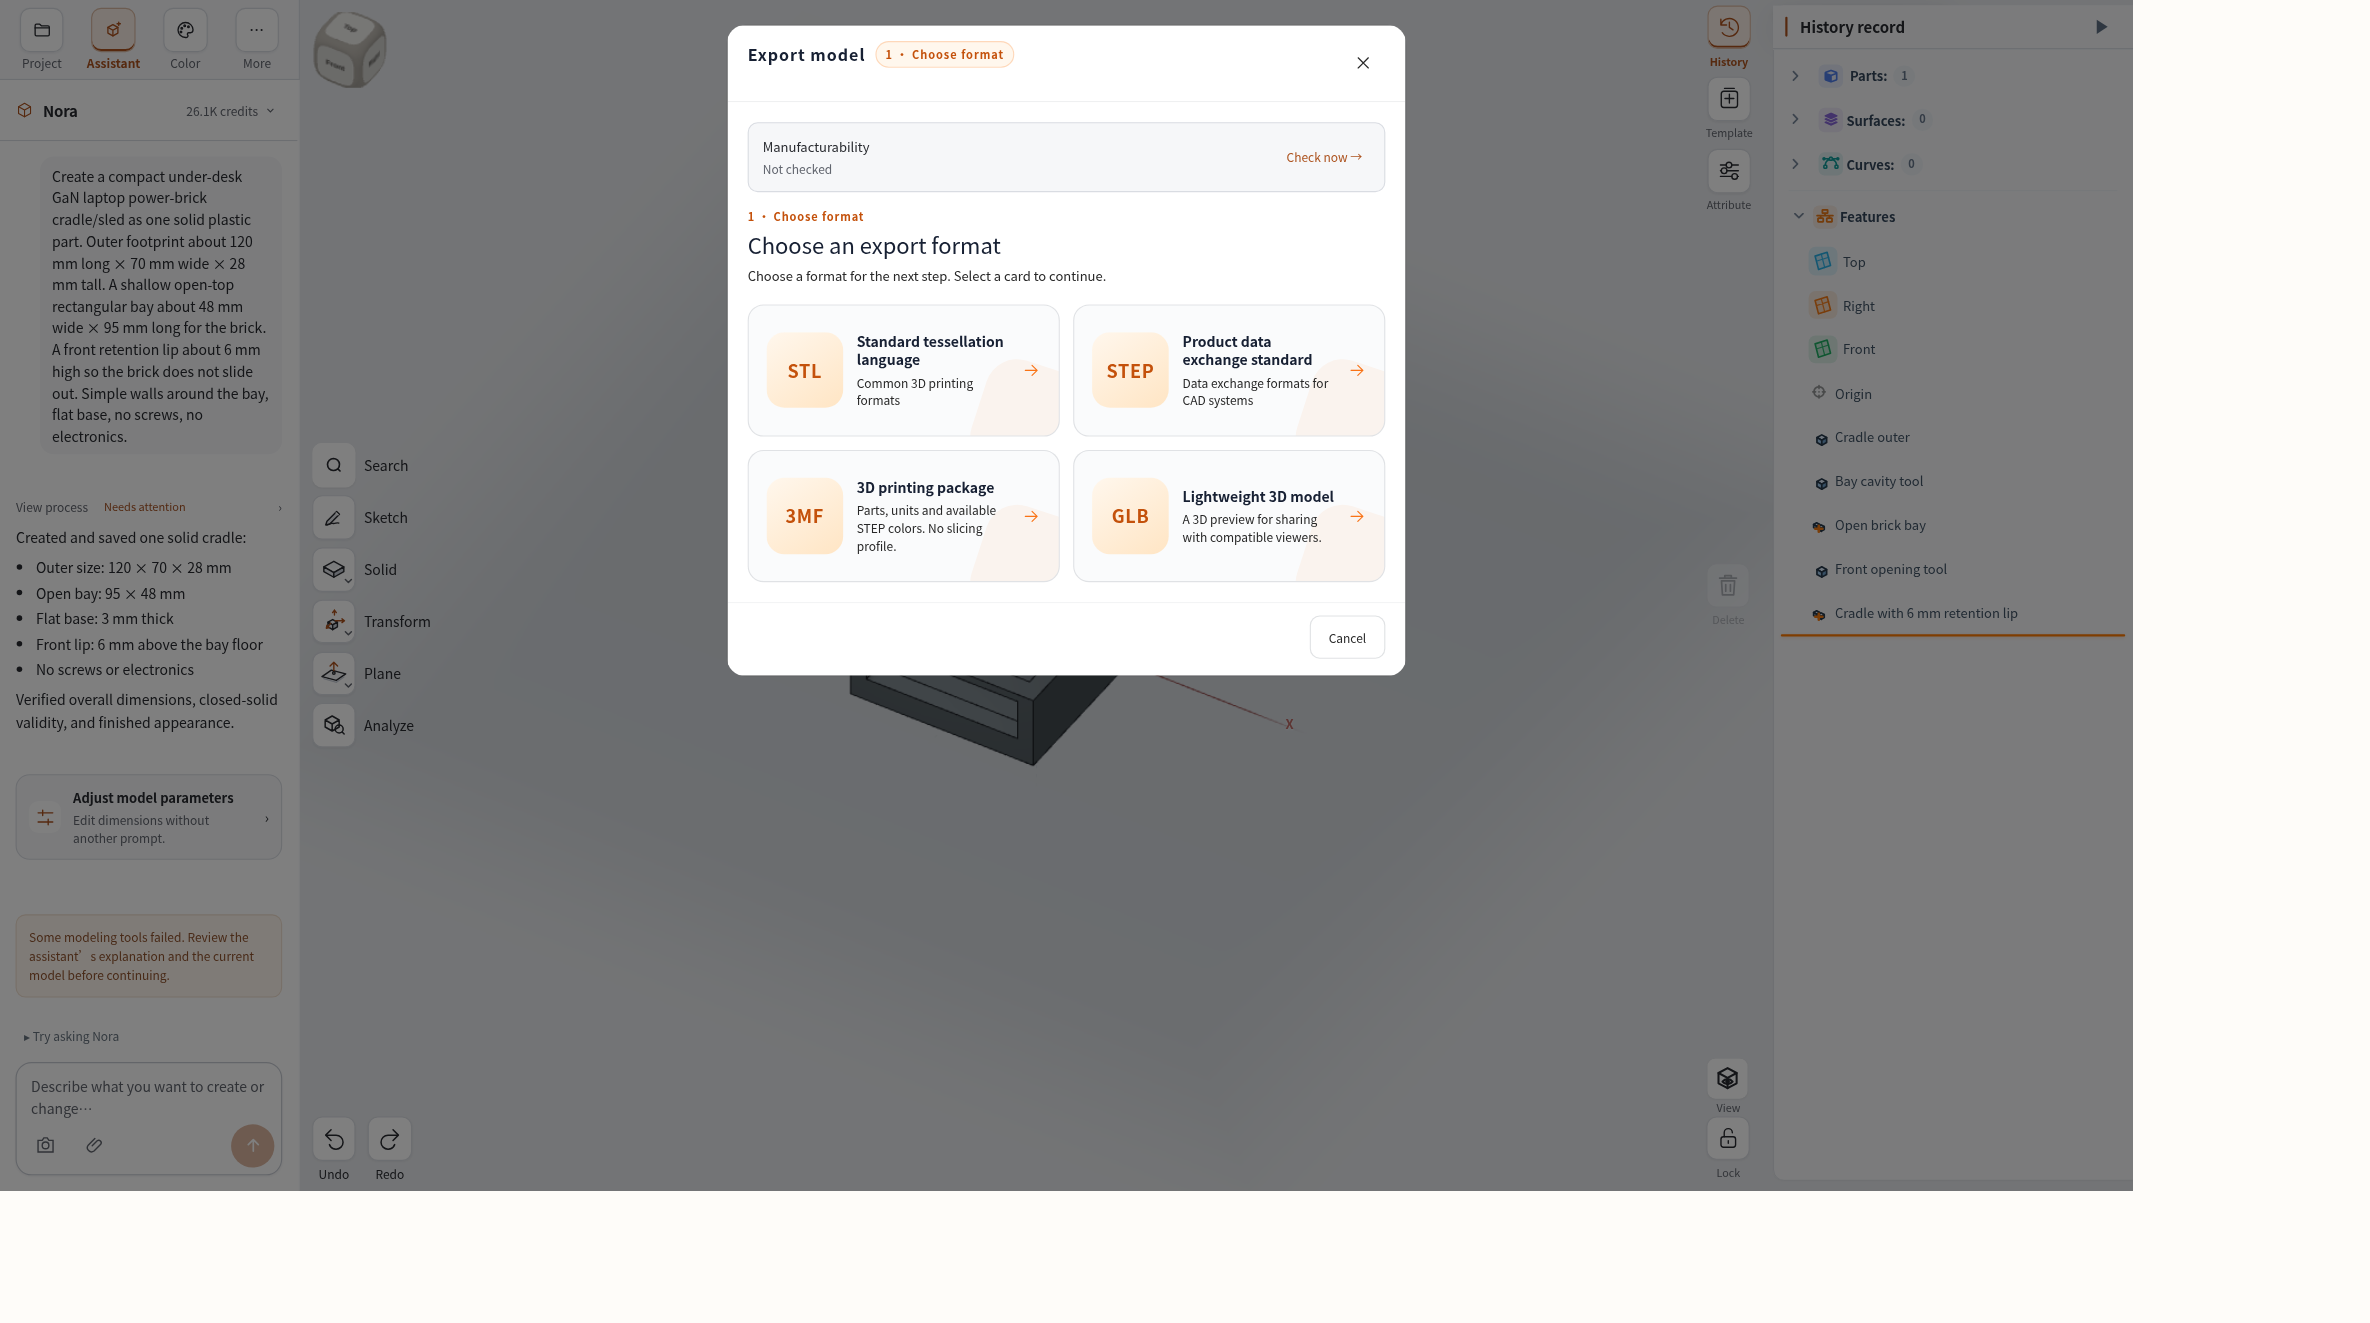
When the bay and lip look right in the viewport, export from that same workspace model:
- STEP — if the next stop is another CAD tool or a CAM path that wants B-Rep.
- STL — if the next stop is a slicer.
Either way, the export should come from the revised cradle—not a re-prompted twin.
Why this real-world loop matters
The story is not “draw a prettier brick holder.” The story is:
- Real use — a thicker GaN brick changed what the under-desk cradle needs.
- Same model — widen the bay and raise the lip instead of regenerating a whole new sled.
- Keep editing — History and parameters stay available for the next almost-fits change.
- Export when ready — STEP or STL from the part you just refined.
That is AI CAD for functional parts you can keep editing—from a first prompt to an editable solid you continue on phone, tablet, or desktop as your schedule allows.
Closing
Keep the outer cradle. Change the bay. Raise the lip. Export STEP or STL when the design is ready for your downstream tool.
Ready to run the same keep-editing loop? Install Nora3D and open a CAD workspace when you want to revise a functional part in place.